
 Pin it
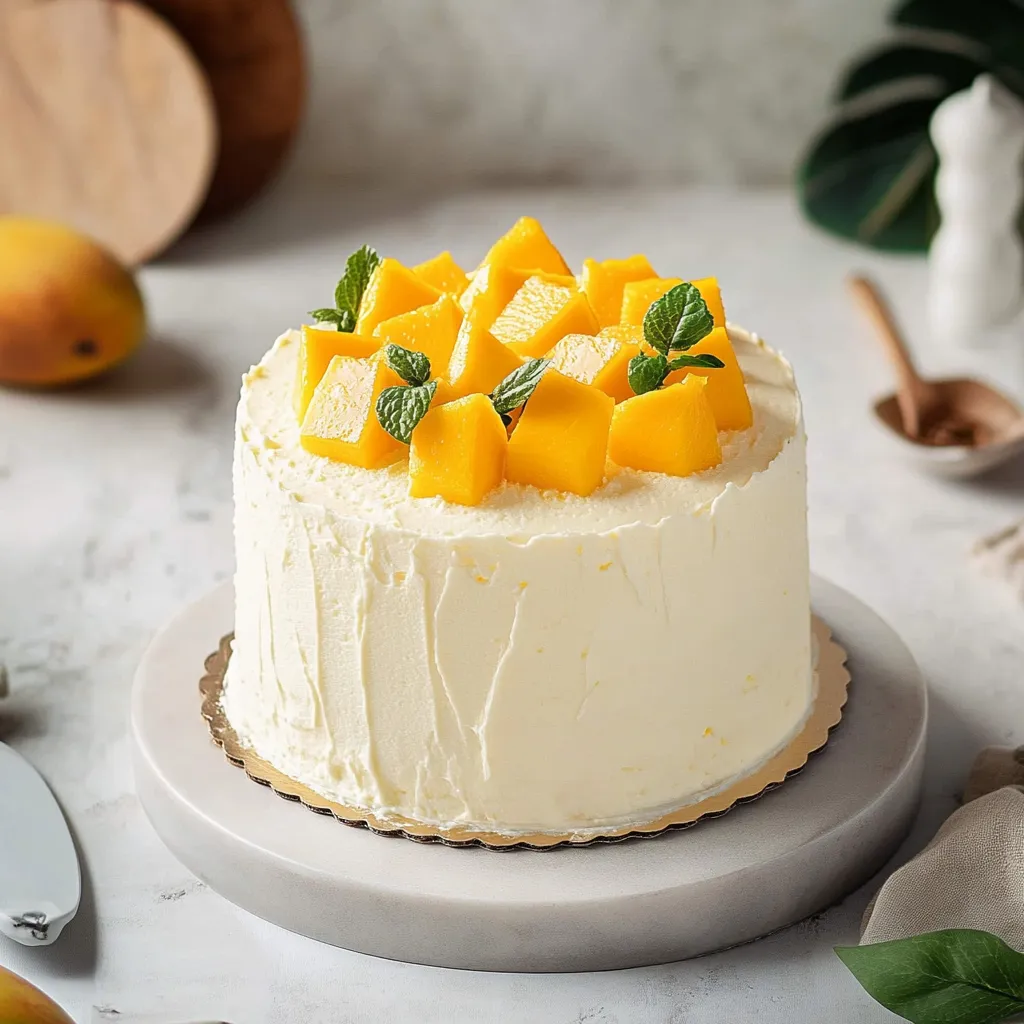
Tropical Cloud Cake
This extraordinary mango cake captures the essence of Asian bakeries with its exceptionally light texture and fresh fruit emphasis. The magic happens in the delicate balance between the airy chiffon cake, vibrant mango filling, and cloud like whipped cream that creates a dessert that feels almost weightless on the tongue. I discovered this style of cake during travels through Japan and Hong Kong, where fruit-forward desserts celebrate natural sweetness rather than overwhelming it with sugar.
Summer Sensation
My journey with this cake began after returning from a trip to Taiwan where similar cakes appeared in nearly every bakery window. What started as an attempt to recreate those memories has become my signature summer dessert. Even my father, who typically avoids sweets entirely, requests this cake specifically for his birthday. The first time I served it at a family gathering, my aunt who prides herself on her traditional layer cake asked for the recipe before finishing her slice.
Premium Ingredients
- Cake Flour (2 cups): With its lower protein content, creates the tender, delicate crumb essential for authentic chiffon texture that distinguishes this cake from standard varieties
- Eggs (5, separated): Provide structure while creating distinct textures, with whites whipped to glossy peaks for lightness and yolks contributing richness
- Cream of Tartar (1/4 teaspoon): Stabilizes the whipped egg whites, ensuring they maintain maximum volume for that signature airy texture
- Vegetable Oil (1/2 cup): Creates exceptional moisture and tenderness that remains even when chilled, unlike butter-based cakes that can firm up in the refrigerator
- Fresh Mangoes (3-4 ripe): Deliver vibrant tropical flavor and natural sweetness that forms the heart of this dessert, with their sunny color brightening every slice
- Heavy Whipping Cream (3 cups): Whips into pillowy clouds that envelop the cake in lightness while allowing the mango flavor to shine without competition
- Vanilla Extract (2 teaspoons): Enhances both cake and cream with subtle aromatic notes that complement the tropical mango without overwhelming it
 Pin it
Bakery Technique
- Chiffon Foundation:
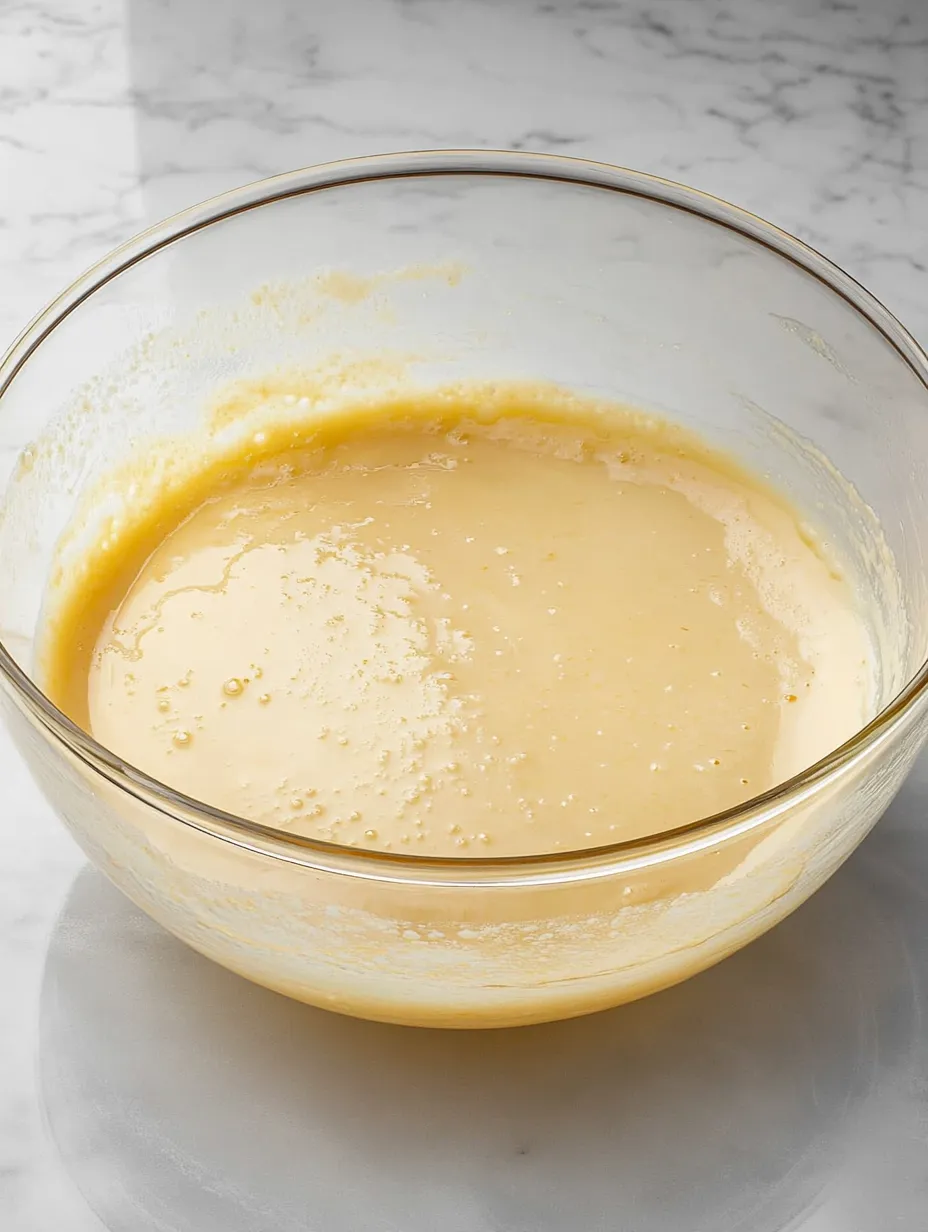
- Begin by positioning your oven rack in the center and preheating to 350°F. This specific temperature creates the perfect environment for the delicate cake to rise evenly without excessive browning. In a medium bowl, sift together 2 cups cake flour, 1 1/2 teaspoons baking powder, and 1/2 teaspoon salt. Sifting incorporates air and removes any lumps that might weigh down your batter. Set this mixture aside while preparing the wet ingredients. In a separate large bowl, whisk together 5 egg yolks, 1/2 cup vegetable oil, 3/4 cup whole milk, 2 teaspoons vanilla extract, and 3/4 cup granulated sugar until smooth and slightly lightened in color. The oil creates a tender crumb that remains soft even when refrigerated, while the egg yolks provide richness and color.
- Meringue Magic:
- In the clean, grease free bowl of a stand mixer fitted with the whisk attachment, combine 5 egg whites and 1/4 teaspoon cream of tartar. Begin whipping on medium speed until the mixture becomes foamy with small bubbles throughout. Gradually add 1/2 cup granulated sugar, approximately one tablespoon at a time, allowing each addition to incorporate before adding more. This slow addition ensures proper sugar dissolution and stable meringue formation. Increase speed to medium high and continue whipping until stiff, glossy peaks form when the whisk is lifted. The meringue should be firm enough to hold its shape but still appear smooth and shiny rather than dry or granular. This properly whipped meringue creates the signature lightness that defines chiffon cake.
- Gentle Integration:
- Gradually add the dry ingredient mixture to the egg yolk mixture in three additions, folding gently with a rubber spatula after each addition until just combined. Be careful not to overmix, which would develop gluten and create a tougher texture. Using the same gentle folding motion, add approximately one third of the meringue to the batter to lighten it. This initial incorporation makes adding the remaining meringue easier without deflating the air bubbles. Add the remaining meringue in two additions, using a deliberate under and over folding technique that preserves as many air bubbles as possible. The finished batter should appear uniform in color with no visible streaks of meringue, while maintaining a light, airy consistency that flows slowly when the spatula is lifted.
- Baking Brilliance:
- Pour the batter into ungreased 8 inch round cake pans, filling each approximately two thirds full. Tap the pans gently on the counter a few times to release any large air bubbles that could create holes in the finished cake. Bake in the preheated oven for 25 to 30 minutes, or until a toothpick inserted in the center comes out clean and the tops spring back when lightly touched. The cake will rise significantly during baking, developing a golden crown on top. Allow the cakes to cool completely in their pans, inverted on a cooling rack to prevent collapse during cooling. This inversion stretches the cake structure as it cools, maintaining maximum height and airiness. Once completely cool, run a thin knife around the edges and gently remove from the pans.
- Cream Creation:
- While the cakes cool, prepare the whipped cream frosting. Chill your mixing bowl and whisk attachment in the freezer for 15 minutes before beginning, which helps achieve maximum volume. In the chilled bowl, combine 3 cups cold heavy whipping cream, 1/2 cup powdered sugar, and 1 teaspoon vanilla extract. Begin whipping on medium low speed until small bubbles form, then gradually increase to medium high. Whip until the cream holds medium peaks that stand mostly upright but with tips that curl slightly when the whisk is lifted. This consistency provides enough structure to support the cake layers and fruit while remaining soft and cloud like on the palate. Refrigerate the whipped cream if not using immediately.
- Mango Preparation:
- Select mangoes that yield slightly to gentle pressure, indicating perfect ripeness without being overly soft. Peel the mangoes with a sharp vegetable peeler or paring knife, then stand each mango on its end and slice downward along each side of the flat seed to create two large cheeks. Cut these cheeks into 1/4 inch cubes for the filling, and slice a few thin, attractive pieces for decoration. The small cubes create the perfect texture in each bite, while maintaining their shape between the cake layers. Reserve approximately 2 cups of cubed mango for the filling and the attractive slices for the top decoration.
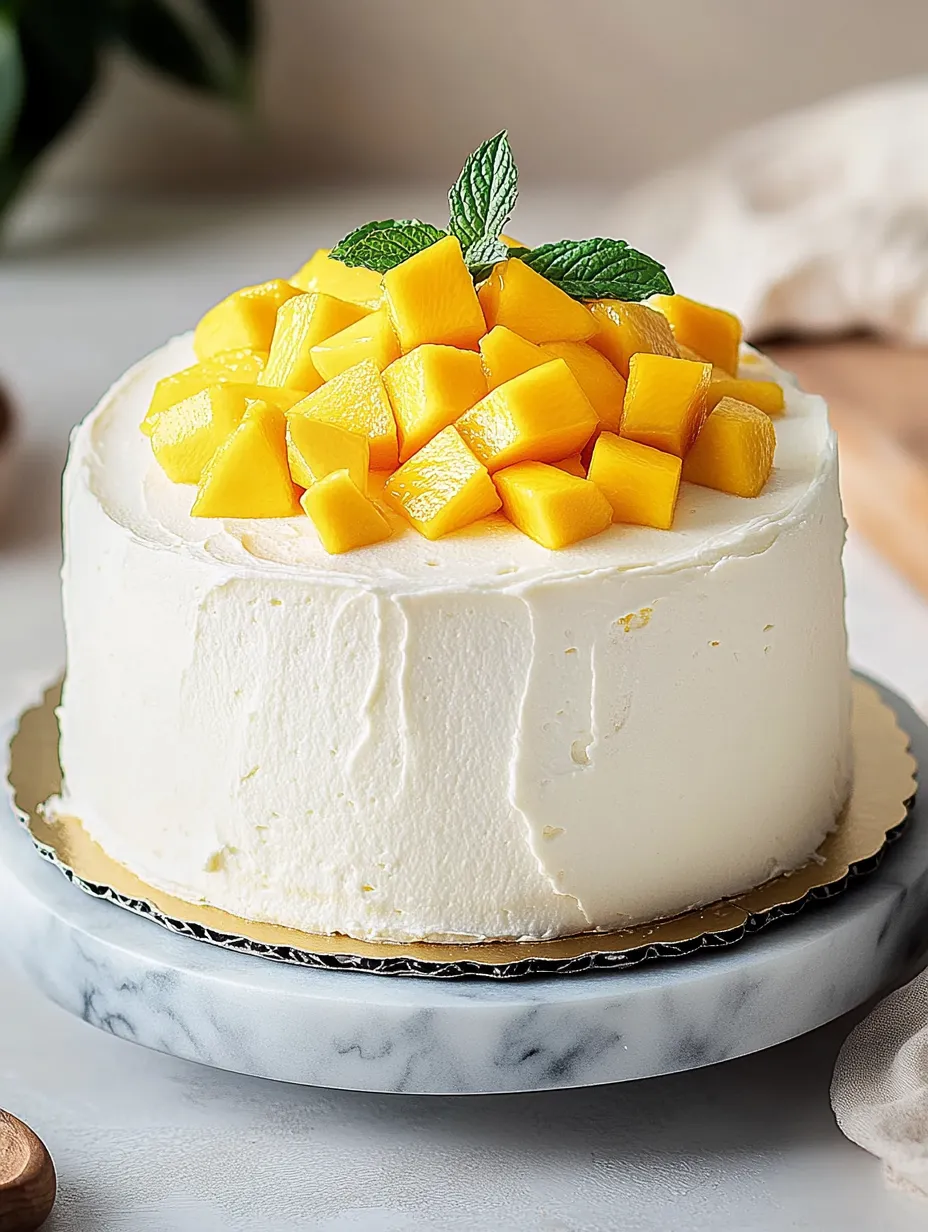
- Assembly Artistry:
- Using a long serrated knife, carefully level the tops of your cooled cake layers if needed, then slice each layer horizontally into two even layers, creating four thin layers total. Place the first layer on your serving plate and spread with approximately 3/4 cup of the whipped cream, leaving a 1/2 inch border around the edge. Scatter 1/3 of the diced mango evenly over the cream. The border prevents filling from squeezing out when the next layer is added. Repeat this process with the second and third layers. Place the final layer on top, cut side down for a smooth finishing surface. Apply a thin crumb coat of whipped cream over the entire cake, then refrigerate for 20 minutes to set this initial layer. After chilling, apply the remaining whipped cream in a generous, swirling pattern over the entire cake. Decorate the top with the reserved mango slices arranged in a simple but attractive pattern. Refrigerate the completed cake for at least 2 hours before serving to allow the flavors to meld and the cake to set for clean slicing.
I particularly appreciate how this cake celebrates the natural flavor of mangoes without masking it under excessive sweetness. Growing up in a family that favored heavier, American style cakes, this lighter approach felt revolutionary when I first discovered it. My grandmother initially dismissed it as "not a real cake" until her first taste converted her completely. Now she requests it for afternoon tea with her friends, proudly telling them her granddaughter makes "that fancy Asian style cake." The vibrant yellow interior never fails to bring smiles, regardless of the occasion, and seems to brighten even rainy summer days with its sunny appearance.
Serving Suggestions
This versatile cake welcomes numerous presentation options depending on the occasion. For casual family gatherings, serve slices on simple white plates that showcase the colorful layers within. A light dusting of powdered sugar just before serving adds elegant contrast without additional sweetness. When entertaining guests, consider placing small edible flowers alongside each slice for a sophisticated presentation that enhances the cake's delicate nature. For special celebrations, garnish the platter with additional fresh mango slices and mint leaves surrounding the cake. Coffee enthusiasts will appreciate serving alongside a light roast coffee that complements rather than competes with the subtle flavors. During summer months, a small scoop of coconut sorbet makes a refreshing accompaniment that echoes the tropical theme.
Creative Variations
This foundation recipe welcomes numerous adaptations based on preference or seasonal availability. Consider substituting ripe peaches or nectarines during their peak season, maintaining the same preparation method for equally delightful results. Passion fruit creates an especially memorable variation, with its intense flavor complementing the light cake beautifully. Simply spoon the passion fruit pulp over each layer of whipped cream before assembly. For coconut enthusiasts, replace one third of the milk in the cake with coconut milk and add 1/2 cup toasted coconut between layers alongside the mango. Those seeking a celebratory touch might add a splash of rum to the whipped cream for subtle complexity. For a stunning visual adaptation, create an ombré effect by tinting portions of the whipped cream with natural mango purée in graduated intensity before frosting.
 Pin it
Storage Wisdom
This cake maintains its best quality when properly stored in the refrigerator. Cover loosely with a cake dome rather than plastic wrap, which can stick to and damage the delicate frosting. The cake keeps beautifully for up to three days, though the texture is absolutely optimal within the first 48 hours. For serving, remove from refrigeration approximately 20 minutes before slicing to allow the cream to soften slightly for the ideal mouthfeel. If preparing components ahead for a special occasion, the unfrosted cake layers can be wrapped tightly in plastic and stored at room temperature for up to one day, or frozen for up to one month. Thaw frozen layers completely in the refrigerator before unwrapping to prevent condensation from making them soggy. The whipped cream should always be prepared within 24 hours of assembly for maximum freshness and stability.
After making this cake countless times for various occasions, I've come to appreciate it not just for its delicious flavor but for the joy it brings to those who experience it. What begins as simple ingredients transforms through careful technique into something that seems far more complex than it actually is. The contrast between the delicate cake, creamy frosting, and fresh fruit creates a perfect balance that satisfies without overwhelming the palate. While many elaborate desserts disappoint after the initial visual impression, this cake delivers on both appearance and flavor, proving that sometimes the most memorable desserts aren't the most complicated but rather those that celebrate quality ingredients through thoughtful preparation.
Frequently Asked Questions
- → What type of mangoes work best for this cake?
- Alphonso, Ataulfo (also called honey or champagne mangoes), or Kent mangoes work exceptionally well for this cake due to their sweet flavor and firm yet tender texture. Look for mangoes that yield slightly to gentle pressure but aren't mushy. They should have a sweet, fragrant aroma at the stem end. For the best flavor, use mangoes that are perfectly ripe - not underripe or overripe. If your mangoes aren't quite ripe, let them sit at room temperature for a few days until they develop more sweetness and aroma.
- → Why separate the eggs for the chiffon cake?
- Separating eggs is crucial for achieving the signature light, airy texture of chiffon cake. The egg whites are whipped separately with sugar to create a meringue, which incorporates air bubbles that expand during baking, providing lift and structure. Meanwhile, the egg yolks contribute richness and moisture. This separation technique creates the perfect balance of lightness and tenderness that makes chiffon cake different from other cakes. For best results, ensure your egg whites are completely free of any yolk contamination, as fat prevents proper whipping.
- → Can I make this cake in advance?
- Yes, you can make components in advance. The chiffon cake layers can be baked 1-2 days ahead, wrapped tightly in plastic wrap once completely cool, and stored at room temperature. The whipped cream should be made within 24 hours of assembly. The fully assembled cake is best enjoyed within 2-3 days and must be stored in the refrigerator due to the fresh fruit and whipped cream. For the freshest presentation, decorate with the final mango pieces just before serving. Do not freeze the assembled cake as the texture of the mangoes and whipped cream will deteriorate upon thawing.
- → Why is my chiffon cake dense instead of fluffy?
- Dense chiffon cake typically results from one of several issues: 1) Underbeaten egg whites - ensure they reach stiff peaks that stand up straight when the whisk is lifted, 2) Overmixing when folding components together - use a gentle upward motion and stop once just combined to preserve air bubbles, 3) Opening the oven door during the first half of baking - this causes temperature drops that prevent proper rising, or 4) Using cold ingredients - eggs especially should be at room temperature for optimal volume. Remember, the batter should be light and fluffy before baking, and the cake pans should not be greased, as the batter needs to climb up the sides as it rises.
- → How do I prevent my whipped cream frosting from becoming runny?
- For stable whipped cream frosting: 1) Use cold heavy cream straight from the refrigerator, 2) Chill your mixing bowl and beaters in the freezer for 15-20 minutes before whipping, 3) Don't overwhip - stop at medium-stiff peaks when the cream holds its shape but still looks smooth and glossy, 4) Add powdered sugar, which contains cornstarch that helps stabilize the cream, 5) For extra stability in warm weather, you can add 1-2 tablespoons of instant vanilla pudding mix or 1 teaspoon of unflavored gelatin bloomed in 1 tablespoon of cold water and melted before adding to partially whipped cream. Always keep the finished cake refrigerated until shortly before serving.
- → Can I use canned mango instead of fresh?
- While fresh mango provides the best flavor and texture for this cake, you can use canned mango in a pinch. Choose canned mango pieces in juice rather than syrup, and drain them very well before using. Pat them dry with paper towels to remove excess moisture that could make your cake soggy. Keep in mind that canned mangoes are often softer than fresh, so handle them gently when layering. The flavor profile will be slightly different - less vibrant and fresh - but the cake will still be delicious. For the decoration on top, fresh mango is strongly recommended for visual appeal.