
 Pin it
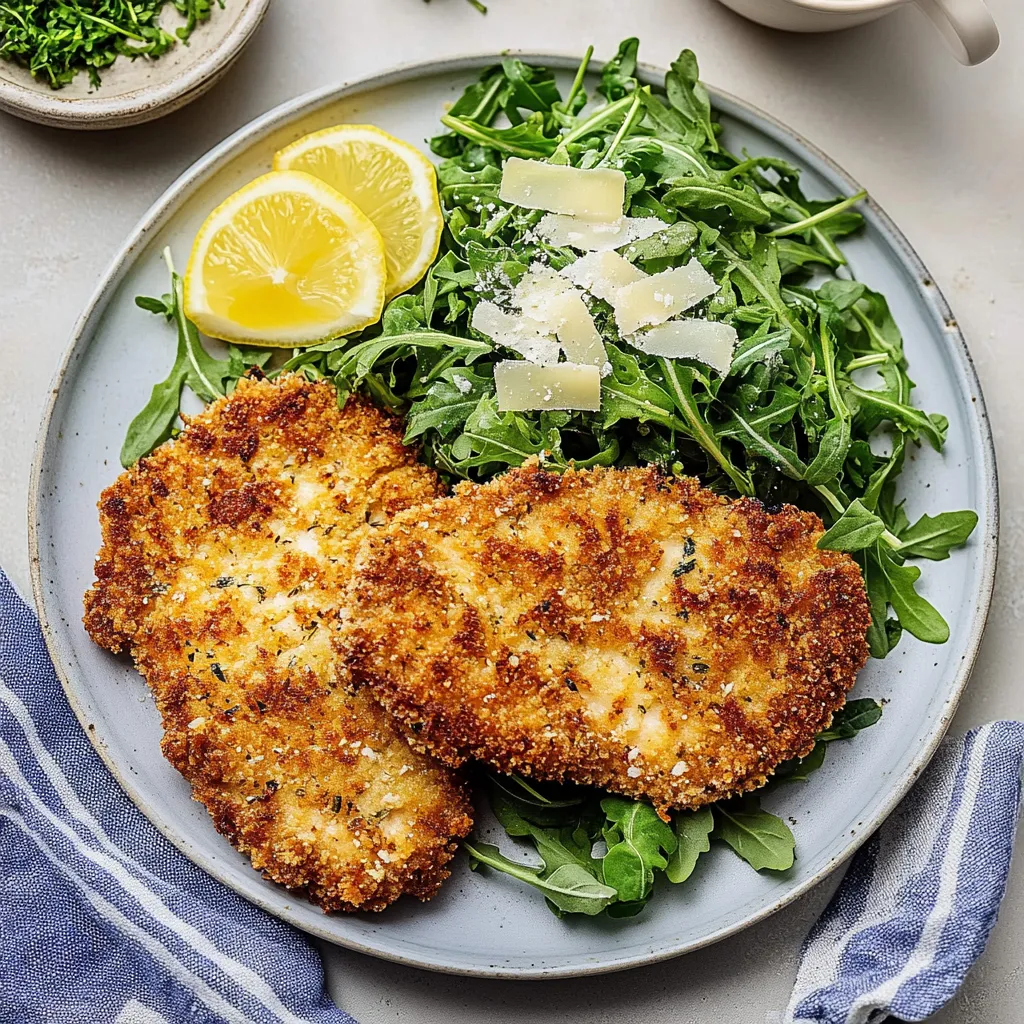
This extraordinary chicken dish transforms ordinary chicken breasts into something truly special through a perfect balance of crispy coating and tender interior that delights with every bite. The magic happens in the three step breading process that creates an exceptional crust enhanced with Parmesan, herbs, and lemon that elevates this far beyond basic breaded chicken. I developed this recipe after visiting a small family restaurant in Italy where the simplicity and perfection of their Milanese inspired me to recreate that experience at home.
Weeknight Wonder
My journey with this dish began during a particularly busy season when I wanted meals that felt special without requiring hours in the kitchen. What started as a practical solution quickly became our household's most requested chicken preparation. Even my father, typically loyal to his traditional schnitzel recipe, requested my version after his first bite. The perfect combination of ease and sophistication makes this recipe particularly valuable for those moments when you want to elevate everyday chicken without complicated techniques or obscure ingredients.
Superior Ingredients
- Chicken Breasts (4 boneless, skinless): The perfect canvas for this preparation, with their mild flavor and ability to become exceptionally tender when properly butterflied and pounded
- Panko Breadcrumbs (1 cup): Create the signature crispy texture that distinguishes this dish from standard breaded chicken, with their larger, airier structure
- Fresh Parmesan (1/2 cup grated): Contributes essential savory depth and slight saltiness to the coating while adding rich umami notes throughout
- Fresh Parsley (2 tablespoons chopped): Brightens the coating with herbaceous notes and beautiful green flecks that signal freshness and care in preparation
- Lemon Zest (1 tablespoon): Provides aromatic citrus notes that permeate the coating, adding sophisticated complexity beyond what herbs alone could achieve
- Quality Olive Oil: Creates the perfect frying medium with its flavor contribution that complements the Mediterranean profile of the dish
- Fresh Arugula: Delivers peppery brightness and vibrant color that balances the richness of the fried chicken while completing the traditional presentation
 Pin it
Simple Technique
- Perfect Preparation:
- Begin with proper chicken preparation, which forms the foundation for exceptional results. Place each chicken breast on a cutting board and, with your hand flat on top, carefully butterfly by slicing horizontally through the middle, stopping just short of cutting all the way through. Open the breast like a book to create one larger, thinner piece. Place the butterflied breasts between sheets of plastic wrap or parchment paper and gently pound with a meat mallet or heavy pan until they reach an even 1/4 inch thickness throughout. This uniform thickness ensures even cooking and tender results. Season both sides generously with salt and freshly ground black pepper, which layers flavor from the very beginning rather than relying solely on the coating for seasoning.
- Coating Architecture:
- Create an efficient three step breading station for streamlined preparation. In the first shallow dish, combine 1/2 cup all purpose flour with 1 teaspoon garlic powder and 1/2 teaspoon salt, whisking thoroughly to distribute seasonings. This first layer creates a dry surface that helps the egg adhere properly. In the second dish, whisk 2 large eggs until completely smooth with no visible egg white strands. In the third dish, combine 1 cup panko breadcrumbs, 1/2 cup freshly grated Parmesan cheese, 2 tablespoons chopped fresh parsley, and 1 tablespoon lemon zest, mixing thoroughly. This thoughtfully seasoned coating creates layers of flavor that distinguish this dish from simpler breaded chicken preparations. The progression from fine flour to light eggs to textured crumb mixture builds the perfect architecture for exceptional crispiness.
- Coating Application:
- Working with one chicken piece at a time, dredge first in the seasoned flour, shaking off any excess. Next, dip into the beaten eggs, allowing extra to drip off while ensuring complete coverage. Finally, press firmly into the panko mixture, using your fingers to ensure the crumbs adhere to all surfaces. This pressing technique is crucial for creating a coating that remains intact during cooking. Place the breaded chicken onto a clean plate or baking sheet and repeat with remaining pieces. For best results, allow the breaded chicken to rest for 5 to 10 minutes before cooking, which helps the coating set and adhere properly. If preparing ahead, place the breaded chicken uncovered in the refrigerator for up to an hour, which further helps the coating set for optimal crispiness.
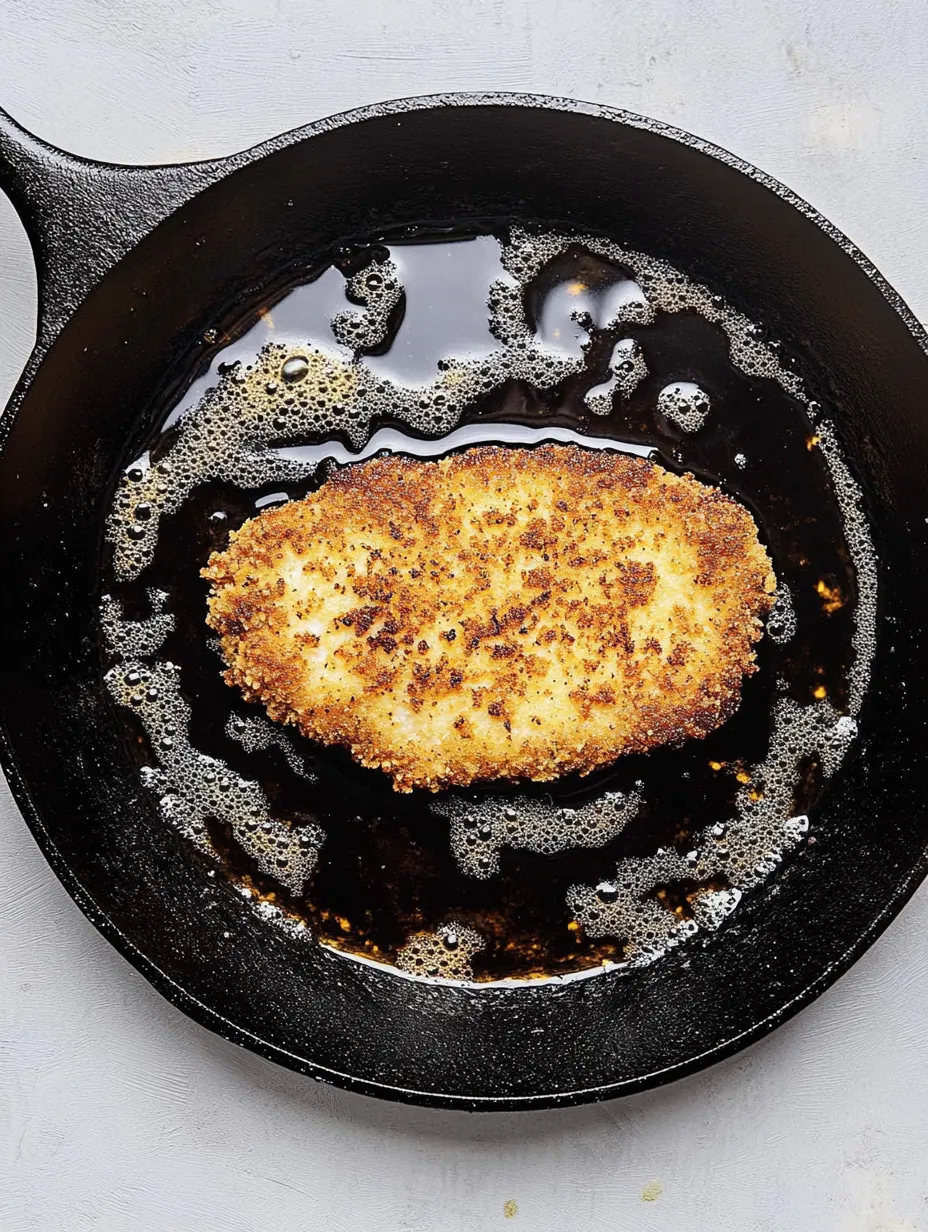
- Perfect Cooking:
- Heat 1/4 cup olive oil in a large, heavy skillet over medium high heat until shimmering but not smoking. The oil temperature is crucial for proper cooking; too cool and the coating absorbs excess oil, too hot and it burns before the chicken cooks through. Test the oil temperature by dropping a few breadcrumbs into the pan; they should sizzle immediately but not burn quickly. Working in batches if necessary to prevent overcrowding, carefully place the breaded chicken into the hot oil. Cook for approximately 3 minutes on the first side until golden brown and crispy, then carefully flip using a thin spatula to avoid disturbing the coating. Cook an additional 2 to 3 minutes on the second side until equally golden and the chicken reaches an internal temperature of 165°F. Transfer to a paper towel lined plate to absorb excess oil. If cooking multiple batches, you may need to add additional oil between batches and allow it to return to proper temperature before adding more chicken.
I particularly treasure how this dish connects to my travel memories while fitting perfectly into my everyday life. Growing up, breaded chicken meant heavy, sometimes greasy cutlets that felt leaden after eating. The first time I experienced proper Milanese in Italy, with its light, crisp coating and perfect balance of flavors, it completely changed my understanding of what breaded chicken could be. When teaching my nephew basic cooking techniques, this became one of our first "grown up" recipes, building his confidence through the forgiving yet impressive nature of the dish. The proud smile when he served these golden cutlets to his parents created kitchen memories more valuable than any culinary school technique.
Perfect Pairings
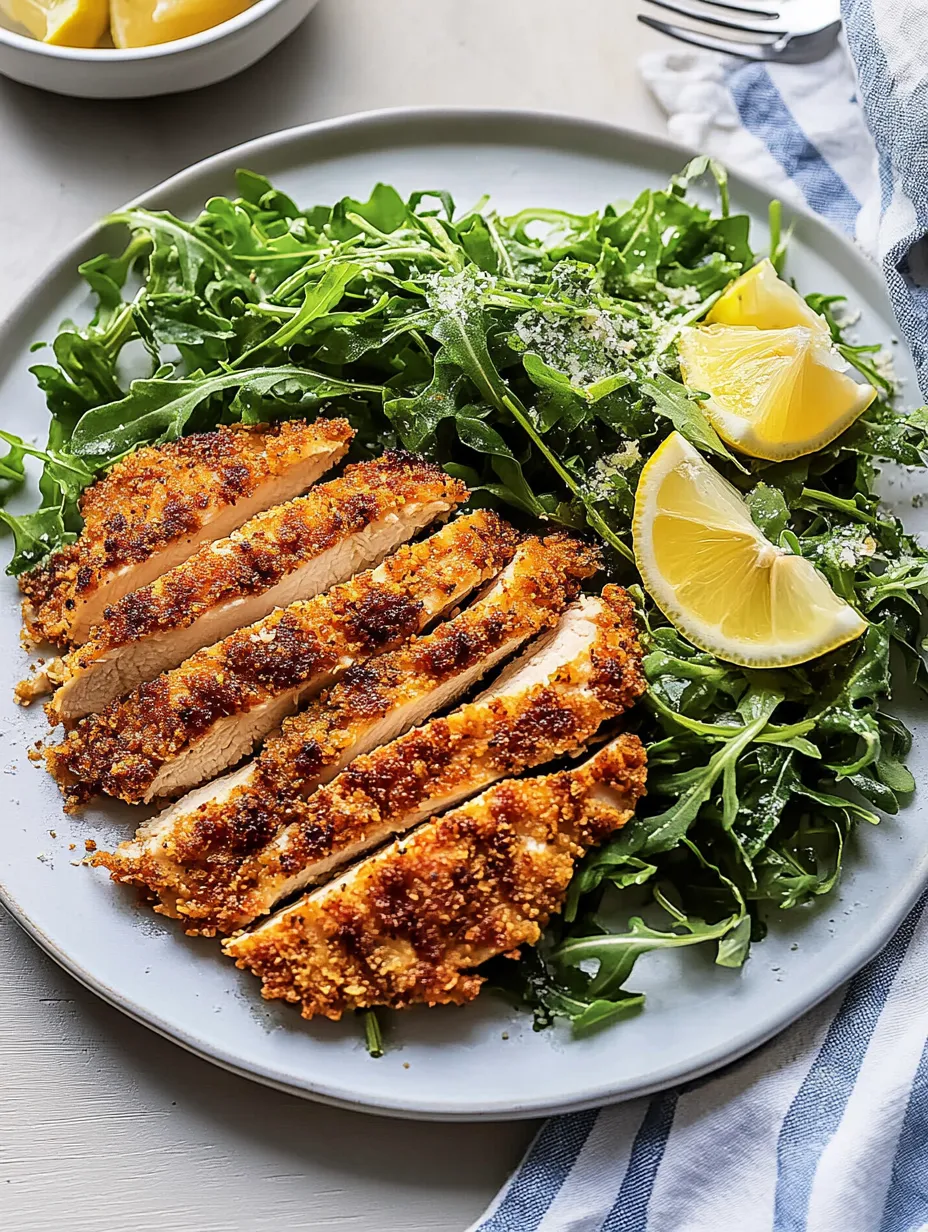
This versatile chicken welcomes numerous accompaniments depending on the occasion and season. For traditional Italian serving, top each cutlet with a generous portion of lightly dressed arugula tossed with lemon juice, olive oil, salt and pepper. The peppery greens and bright acidity cut through the richness of the fried chicken beautifully. A few shavings of additional Parmesan and lemon wedges for squeezing complete this classic presentation. For a more substantial meal, consider serving alongside roasted potatoes seasoned with rosemary or a simple pasta dressed with butter and herbs. During warmer months, a tomato and cucumber salad with fresh basil provides refreshing contrast to the crispy chicken. For entertaining, consider offering a selection of Italian antipasti beforehand, such as marinated olives, roasted peppers, and quality cheeses that complement the Mediterranean theme.
Creative Adaptations
This foundation recipe welcomes numerous variations based on preference or available ingredients. For herb variations, substitute or combine the parsley with fresh thyme, oregano, or basil for different aromatic profiles. Those enjoying heat might add a pinch of red pepper flakes to the breadcrumb mixture or a touch of cayenne to the flour for subtle warmth throughout. The basic preparation technique works beautifully with other proteins, including pork tenderloin pounded thin, turkey cutlets, or even firm white fish for a lighter option. For gluten free adaptations, substitute the all purpose flour with rice flour and the panko with gluten free breadcrumbs, adjusting cooking time slightly as these alternatives often brown more quickly. Those seeking additional richness might top the hot cutlets with a pat of compound butter flavored with herbs and garlic that melts beautifully over the crisp surface. For a complete flavor transformation, add a tablespoon of grated pecorino to the breadcrumb mixture for sharper flavor or incorporate lemon pepper seasoning for brighter citrus notes.
 Pin it
Storage Strategy
While this chicken reaches its absolute peak when freshly cooked, proper storage allows for enjoyable leftovers. Allow any remaining cutlets to cool completely before storing in an airtight container in the refrigerator for up to four days. For best texture when reheating, avoid microwave methods which create sogginess. Instead, place refrigerated cutlets on a wire rack over a baking sheet in a preheated 400°F oven for 8 to 10 minutes until heated through and re crisped. Air fryers also work beautifully for reheating, requiring just 3 to 4 minutes at 375°F. Leftover chicken transforms wonderfully into sandwiches on crusty bread with a spread of pesto or aioli and fresh greens for lunch the next day. For a completely different presentation, cut cold leftover chicken into strips and serve atop a large salad with vegetables and a light vinaigrette for a satisfying meal that requires no reheating at all.
After preparing this dish countless times for both everyday dinners and special occasions, I've come to appreciate it not just for its delicious flavor but for how it exemplifies thoughtful simplicity in cooking. What begins as basic chicken transforms through careful technique and quality ingredients into something truly memorable that satisfies on multiple levels. The perfect balance of crispy exterior and tender interior creates textural contrast that elevates this beyond typical weeknight fare. While restaurant versions often disappoint with greasy coatings or dry meat, this homemade adaptation delivers consistent excellence that reminds us why classics endure. The joy of creating restaurant quality results in your own kitchen with relatively little effort makes this recipe a true culinary treasure worth mastering and sharing.
Frequently Asked Questions
- → Can I use chicken thighs instead of chicken breasts for Chicken Milanese?
- Yes, you can use boneless, skinless chicken thighs for Chicken Milanese, but they'll need some adjustments. Pound them a bit thinner than breasts since they're naturally thicker. Thighs are more flavorful and stay juicier than breasts, but they might take slightly longer to cook through. Make sure they reach 165°F internal temperature for food safety.
- → How do I know when the oil is hot enough for frying the chicken?
- For perfect Chicken Milanese, the oil should be around 350°F. If you don't have a thermometer, here's a simple test: drop a few breadcrumbs into the oil - if they sizzle immediately and float to the surface, your oil is ready. If they sink or barely bubble, it's too cool. If they instantly brown or burn, it's too hot. The right temperature ensures crispy chicken without absorbing excess oil.
- → What can I serve with Chicken Milanese besides arugula salad?
- While arugula salad is traditional with Chicken Milanese, there are many delicious alternatives. Try serving it with roasted potatoes, pasta with light marinara sauce, sautéed vegetables like zucchini or green beans, or a caprese salad. For a twist, top the chicken with fresh tomato bruschetta mix or serve with a side of creamy risotto.
- → Can I make Chicken Milanese ahead of time?
- Chicken Milanese is best enjoyed fresh for maximum crispiness, but there are make-ahead options. You can bread the chicken up to 4 hours ahead and refrigerate (uncovered on a wire rack). For leftovers, reheat in a 375°F oven on a wire rack for 10-15 minutes rather than microwaving, which will make it soggy. The breading mixture can be prepared a day ahead.
- → How can I make gluten-free Chicken Milanese?
- For gluten-free Chicken Milanese, simply substitute gluten-free flour for all-purpose flour and use gluten-free panko breadcrumbs (now widely available in grocery stores). The rest of the recipe remains exactly the same. Make sure your work surfaces are free from cross-contamination, and verify that your Parmesan cheese doesn't contain anti-caking agents with gluten.
- → What type of skillet is best for making Chicken Milanese?
- A cast iron skillet is ideal for Chicken Milanese because it maintains consistent heat for even cooking and creates that perfectly crispy exterior. However, any heavy-bottomed skillet will work well. Avoid non-stick pans - they typically can't reach high enough temperatures for optimal frying, and the coating can be damaged at high heat. Whatever pan you choose, make sure it's large enough to fit the chicken without crowding.