
 Pin it
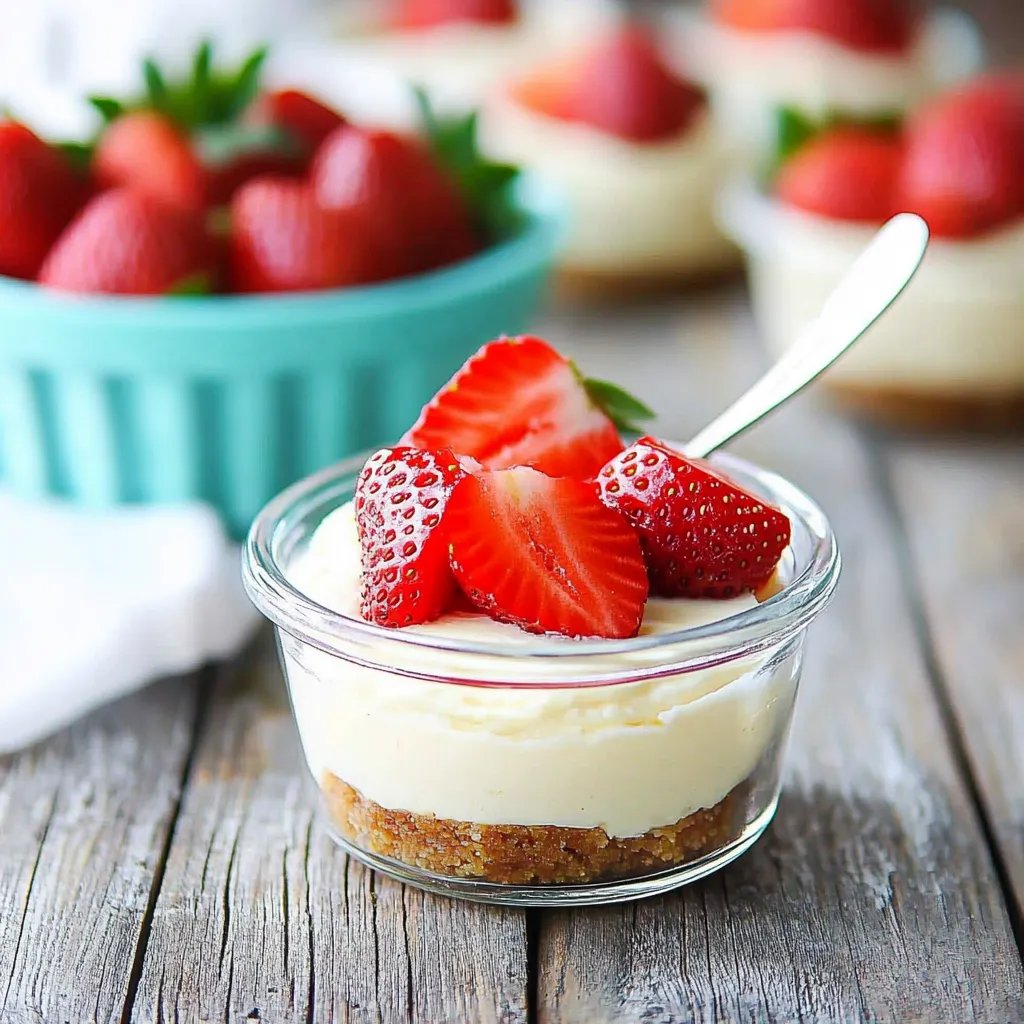
These extraordinary mini cheesecakes create instant celebration without the fuss of traditional baking, transforming simple ingredients into elegant individual desserts. The magic happens in the refrigerator rather than the oven as the filling sets to silky perfection while developing complex flavor that belies its simple preparation. I discovered this recipe during a particularly brutal summer heatwave when turning on the oven seemed criminal yet dessert remained non-negotiable.
Summer Salvation
My journey with these mini cheesecakes began during a fourth of July gathering where I wanted something beyond the expected flag cake or berry pie. What started as practical solution quickly became my most requested contribution to warm weather gatherings. Even my mother, typically loyal to her traditional family cheesecake recipe, requested these for her garden club luncheon, appreciating their elegant portability and foolproof nature. The joy of presenting individual desserts that combine homemade quality with visual charm makes these particularly valuable for creating memorable entertaining without excessive effort.
Quality Components
- Graham Cracker Crumbs (1 1/2 cups): Create the essential crunchy foundation that contrasts beautifully with the creamy filling while providing familiar cheesecake character
- Brown Sugar (1/4 cup): Adds subtle molasses notes and moisture to the crust that granulated sugar cannot provide, creating perfect structure and flavor
- Melted Butter (6 tablespoons): Binds the crust while contributing rich flavor and helping achieve the perfect press in texture when chilled
- Cream Cheese (16 ounces): The star ingredient that provides distinctive tangy flavor and luxurious texture central to proper cheesecake experience
- Sweetened Condensed Milk (1 can): The secret to fool proof filling with its concentrated sweetness and ability to set without baking
- Fresh Lemon Juice (2 tablespoons): Provides essential acidity that balances sweetness while contributing to the chemical reaction that thickens the filling
- Vanilla Extract (1 teaspoon): Enhances all other flavors while adding aromatic complexity that elevates the entire dessert
 Pin it
Simple Technique
- Crust Creation:
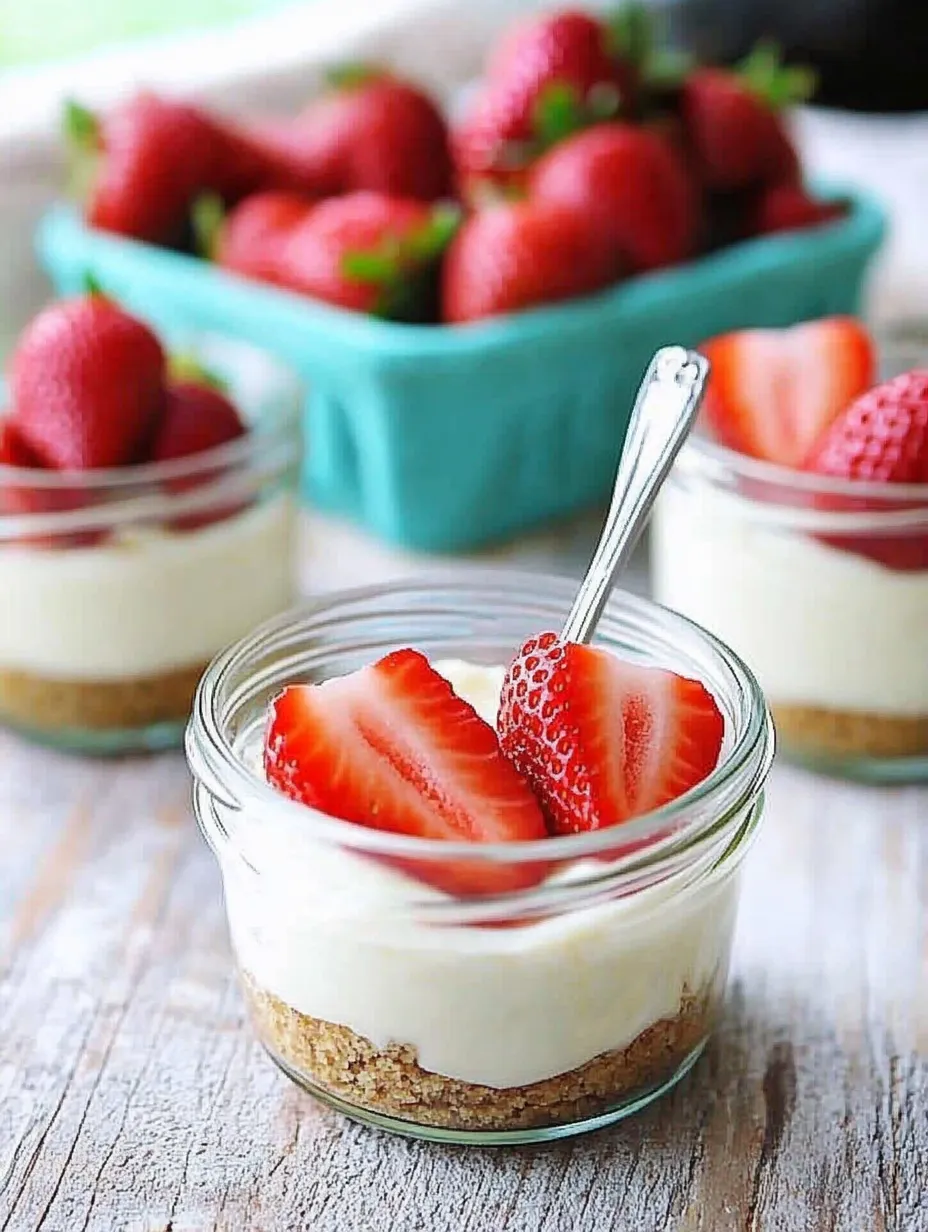
- Begin by preparing the perfect foundation for your mini masterpieces. In a medium bowl, combine 1 1/2 cups graham cracker crumbs, 1/4 cup brown sugar, and 6 tablespoons melted butter, stirring thoroughly until the mixture resembles wet sand. The texture should hold together when pressed between your fingers without being overly greasy. Select your serving vessels, ideally small clear glass jars or dessert cups that showcase the beautiful layers. Mason jars, small juice glasses, or proper dessert coupes all work beautifully, with 4 to 8 ounce capacity being ideal. Divide the graham cracker mixture evenly among your chosen containers, allowing approximately 2 to 3 tablespoons per serving depending on container size. Using the back of a measuring spoon or your fingers, press the crumbs firmly into the bottom of each container, creating an even, compact layer. The pressure applied during this step is crucial for proper crust integrity when serving.
- Filling Finesse:
- For the luscious filling that defines these mini cheesecakes, ensure your cream cheese has come to complete room temperature, which is essential for achieving the silky smooth texture without overbeating. In a large mixing bowl, combine 16 ounces (two 8 ounce packages) of softened cream cheese, 1/4 cup granulated sugar, and 1 teaspoon vanilla extract. Beat with an electric mixer on medium speed until completely smooth and slightly fluffy, approximately 2 minutes, scraping down the sides of the bowl as needed. This initial beating incorporates air for the perfect texture while ensuring no cream cheese lumps remain. Pour in one 14 ounce can of sweetened condensed milk in a slow, steady stream while continuing to beat on medium low speed. The gradual addition allows proper incorporation without overwhelming the mixture. Finally, add 2 tablespoons fresh lemon juice and beat just until combined. The mixture should now be smooth, pourable, and slightly thickened as the acid begins reacting with the dairy products.
- Assembly Artistry:
- Using a spoon or small ladle, divide the cheesecake filling evenly among your prepared crusts, leaving approximately 1/2 inch space at the top of each container for toppings. For the neatest presentation, consider transferring the filling to a piping bag or zip top bag with corner snipped and piping into each container, which prevents drips on the sides of clear glasses. Gently tap each container on the counter a few times to release any air bubbles trapped in the filling, which ensures smooth texture and appearance. Cover each container with plastic wrap, pressing it directly onto the surface of the filling to prevent condensation from forming. Place the prepared cheesecakes in the freezer for 15 minutes to jumpstart the setting process, then transfer to the refrigerator for at least 2 hours before serving, though overnight chilling develops the best flavor and texture. This two stage chilling process creates the perfect consistency more quickly than refrigeration alone.
- Final Flourishes:
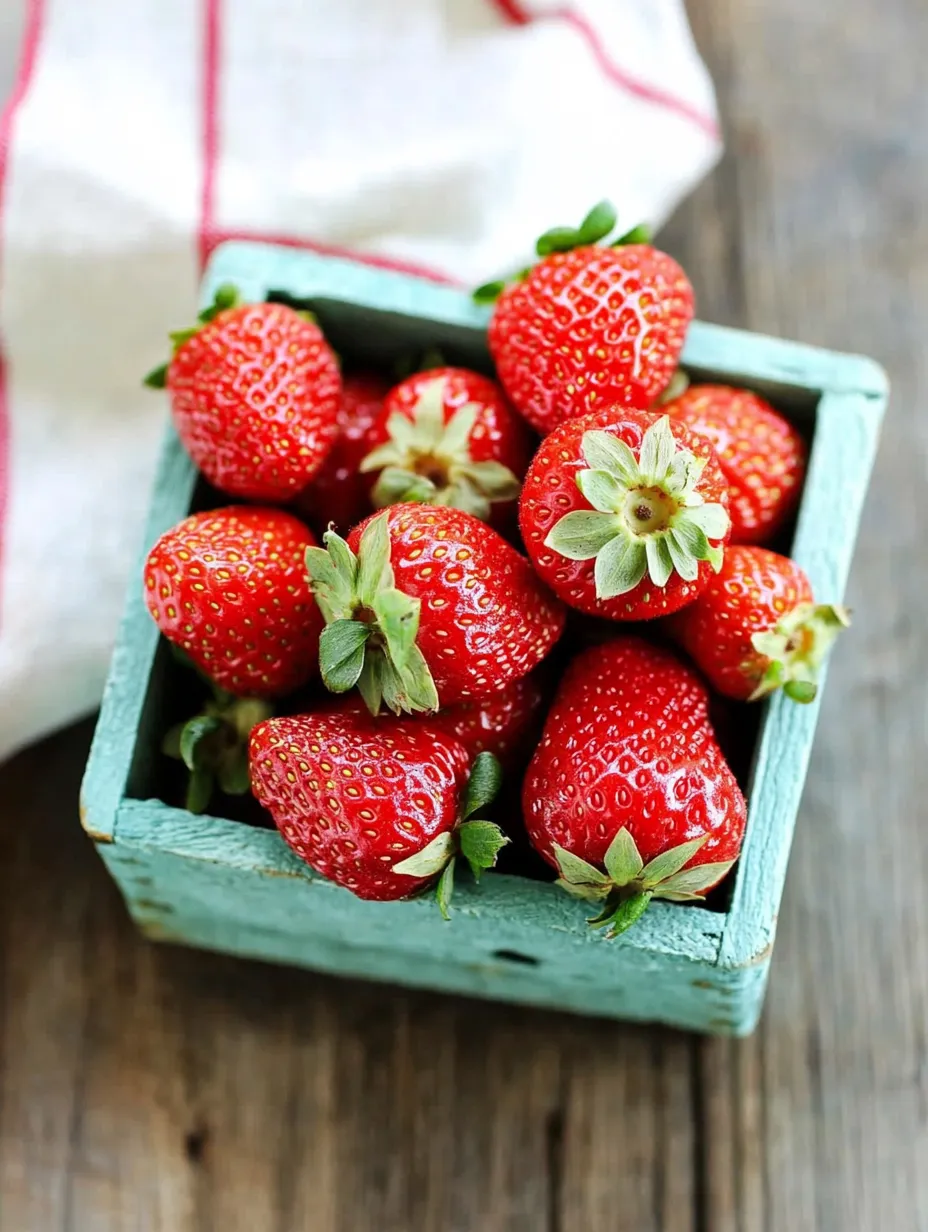
- Just before serving, prepare your chosen toppings to create a stunning final presentation. Fresh berries make perfect seasonal garnishes, with strawberries, blueberries, raspberries, or blackberries providing vibrant color and complementary flavor. For more decadent options, consider cherry pie filling, salted caramel sauce, or chocolate ganache. Whipped cream adds beautiful height and additional creaminess when piped onto the set filling. For visual impact, garnish with mint leaves, lemon zest, or even edible flowers for special occasions. The beauty of individual servings allows for creating variety across your dessert presentation, perhaps offering several topping options for guests to admire and select from. Remove the containers from refrigeration no more than 15 minutes before serving to maintain the perfect chilled texture that defines no bake cheesecake.
I particularly treasure how these desserts connect to summer memories while solving practical entertaining challenges. Growing up, my grandmother prepared elaborate desserts regardless of weather, suffering through kitchen heat for the sake of tradition. The first time I served these no bake alternatives at a family gathering, her skepticism visibly melted with the first bite, leading to an exchanging of recipe cards that felt like a torch passing between generations. When teaching my young niece basic kitchen skills, this became her first "signature" dessert, building confidence through guaranteed success and the joy of personalizing each serving with her chosen toppings. The delight on her face when presenting her creations to family created kitchen memories far more valuable than any technical baking achievement.
Serving Inspiration
These versatile desserts welcome numerous presentation approaches depending on the occasion and season. For casual summer gatherings, create a cheesecake bar with the pre chilled bases and a variety of toppings for guests to customize their own desserts. This interactive approach engages guests while simplifying last minute preparation. For more elegant dinner parties, serve in matching glass coupes with precisely placed berries and mint for sophisticated presentation. Children particularly enjoy these served in colorful plastic cups with sprinkles or cookie crumbles as toppings for birthday celebrations. When transporting to potlucks or picnics, select containers with proper lids that allow for secure travel without damaging the presentation. The petite size makes these perfect for dessert buffets alongside other small bites, allowing guests to sample multiple options without commitment to large slices of traditional desserts.
Creative Variations
This foundation recipe welcomes numerous adaptations based on preference or seasonal inspiration. For chocolate lovers, add 1/3 cup cocoa powder to the filling and use chocolate graham crackers for the crust, creating decadent chocolate cheesecakes. Those enjoying citrus might incorporate additional lemon, lime, or orange zest into the filling for brighter flavor profiles. The crust adapts beautifully to alternative cookies like gingersnaps, chocolate wafers, or shortbread depending on the desired flavor direction. For special dietary needs, consider using gluten free graham crackers or cookies for the crust while maintaining the traditional filling. Adventurous flavor combinations might include adding a layer of dulce de leche between crust and filling or incorporating spices like cinnamon or cardamom into the crust mixture. For adults only gatherings, a tablespoon of liqueur like Kahlúa, Baileys, or Grand Marnier adds sophisticated flavor to the filling without affecting the setting properties.
 Pin it
Storage Strategy
These cheesecakes maintain excellent quality when properly stored, making them ideal for advance preparation. The filled and set cheesecakes can be refrigerated for up to three days when covered properly, though they're best enjoyed within 48 hours for optimal texture and flavor. If using containers with proper lids, simply secure them for storage; otherwise, keep plastic wrap pressed against the surface of the filling to prevent condensation or skin formation. For longest freshness, add toppings just before serving rather than during initial preparation. While technically possible to freeze these for longer storage, the texture changes slightly upon thawing, becoming slightly less creamy though still delicious. If freezing becomes necessary, wrap each container thoroughly and thaw overnight in the refrigerator before serving. For transporting to events, place in a cooler with ice packs, particularly during warm weather, as they should remain chilled until shortly before serving for food safety and optimal texture.
After preparing these mini cheesecakes countless times for gatherings ranging from casual backyard barbecues to baby showers, I've come to appreciate them not just for their delicious flavor but for how they exemplify intelligent entertaining. What begins as a practical solution to avoid heating the kitchen transforms through thoughtful presentation into something that feels special and intentional rather than merely convenient. The balance of rich, creamy filling against crisp graham crust creates textural interest that satisfies deeply without the complication of traditional baking methods. While full sized cheesecakes certainly have their place, these individual portions remind us that sometimes the most memorable entertaining comes from reimagining classics in ways that connect to our modern lives and gathering styles.
Frequently Asked Questions
- → Can I use something other than graham crackers for the crust?
- Absolutely! While graham crackers create the classic cheesecake crust for these Mini No-Bake Cheesecakes, you can easily substitute with other cookies or crackers. Vanilla wafers, gingersnaps, chocolate cookies, digestive biscuits, or even crushed pretzels for a sweet-salty twist all work great. Just crush them finely and follow the same measurements and instructions.
- → Why do my Mini No-Bake Cheesecakes need lemon juice?
- The tablespoon of lemon juice in Mini No-Bake Cheesecakes isn't just for flavor - it's actually crucial for the texture. The acidity in the lemon juice helps the filling set properly by reacting with the proteins in the cream cheese and condensed milk. Without it, your cheesecakes might end up too soft. Don't worry - the small amount won't make your cheesecakes taste lemony unless you add extra.
- → How long do these Mini No-Bake Cheesecakes last in the refrigerator?
- These Mini No-Bake Cheesecakes will keep beautifully in the refrigerator for up to 3 days when covered tightly. For the best presentation, add the toppings just before serving rather than in advance. If you need to make them further ahead, you can freeze the assembled cheesecakes (without toppings) for up to 1 month - just thaw in the refrigerator before serving.
- → What if I don't have individual jars for the Mini No-Bake Cheesecakes?
- Don't worry if you don't have individual jars for your Mini No-Bake Cheesecakes! You have several alternatives: use clear plastic cups, small ramekins, muffin tins lined with paper liners, or even wine glasses for an elegant presentation. Alternatively, you can make one large no-bake cheesecake in a springform pan or pie dish using the same recipe - just increase the chilling time to at least 4 hours or overnight.
- → Why isn't my filling firm enough after chilling?
- If your Mini No-Bake Cheesecakes aren't firm enough after chilling, there could be a few reasons. First, check that you used full-fat cream cheese (light versions contain more water). Make sure your cream cheese was at room temperature when mixing, which helps it blend smoothly without overmixing. Don't skip the lemon juice, which helps the mixture set. Finally, they may simply need more time - try chilling them longer, at least 4 hours or ideally overnight.
- → Can I make these Mini No-Bake Cheesecakes dairy-free?
- Yes, you can make dairy-free Mini No-Bake Cheesecakes with some substitutions! Use dairy-free cream cheese, coconut condensed milk (or a homemade cashew version), and vegan butter for the crust. The texture may be slightly different, but they'll still be delicious. Just note that some dairy-free cream cheese brands set up differently, so you might need to add a bit more lemon juice or even a tablespoon of coconut oil to help them firm up properly.