
 Pin it
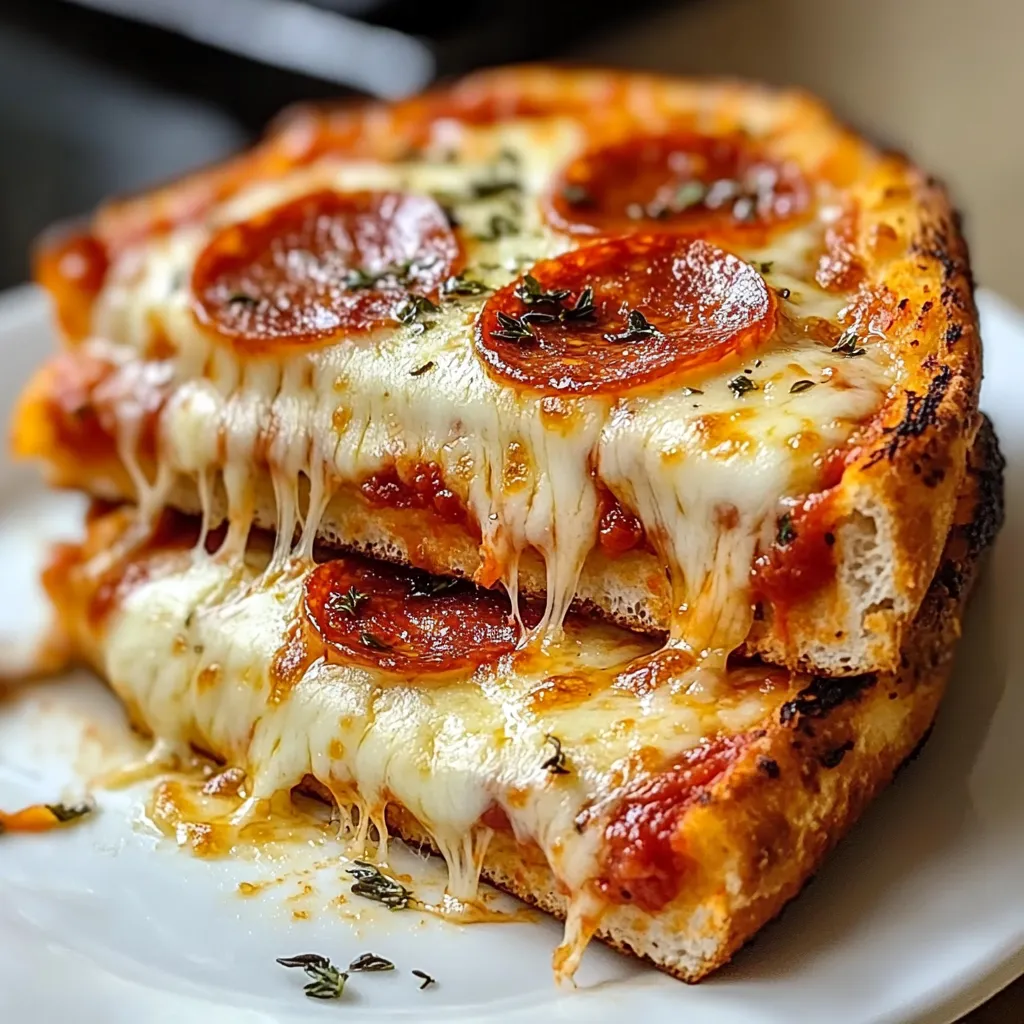
Perfect Pizza Sandwich
This extraordinary sandwich transforms classic pizza flavors into a handheld masterpiece with crispy exterior and gooey, stretchy cheese that creates those irresistible cheese pulls with every bite. The magic happens when traditional pizza toppings meet the hot panini press, creating concentrated flavors and textural contrasts without the time investment of traditional pizza. I created this recipe during a particularly hectic week when craving comfort food but lacking time for proper pizza preparation.
Irresistible Appeal
I first made these panini when hosting an impromptu gathering where everyone wanted pizza but delivery would take too long. What began as a practical solution quickly became the star of the evening, with friends requesting the recipe before leaving. My teenage nephew, typically dismissive of "adult food," requested these three times in one week after his first taste. Even my Italian grandmother, skeptical of pizza variations, gave her approval after I prepared one for her afternoon visit.
Quality Components
- Hearty Bread (4 thick slices): Creates the essential foundation with sturdy structure that stands up to fillings while developing beautiful exterior crispness
- Pizza Sauce (1/2 cup): Delivers concentrated tomato richness with Italian herbs that immediately signals pizza flavor to your taste buds
- Fresh Mozzarella (4 ounces): Provides that signature melty cheese experience with stretchy pulls and mild creaminess that balances the acidic sauce
- Pepperoni (2 ounces): Offers thin, savory discs that crisp slightly during cooking while releasing their spiced oils into the surrounding ingredients
- Cooked Protein (3-4 ounces chicken or beef): Adds satisfying substance and protein that transforms this from snack to proper meal
- Olive Oil Spray: Creates the perfect golden exterior without heaviness, allowing precise application for ideal browning
 Pin it
Simple Technique
- Equipment Preparation:
- Begin by preheating your panini press to medium heat, allowing it to fully reach temperature before adding your sandwich. This ensures immediate searing that prevents sogginess and creates proper caramelization. If you don't have a panini press, a grill pan works beautifully with a heavy skillet placed on top of the sandwich to create similar pressure. For this alternative method, heat your grill pan over medium heat until a drop of water sizzles on contact, indicating perfect temperature for beginning the cooking process. The weight from the additional skillet mimics the pressure of a panini press, creating those distinctive grill marks while compressing the sandwich slightly for better cohesion.
- Bread Foundation:
- Select bread with structure and substance that can withstand the weight of fillings and pressure of cooking without becoming soggy. Slice sourdough, whole wheat, or ciabatta into pieces approximately 3/4 inch thick, which provides the ideal ratio of crispy exterior to soft interior. If using ciabatta with its characteristic air pockets, consider gently hollowing out some of the interior crumb to create more space for fillings without making the sandwich unwieldy. This creates a more even distribution of ingredients and prevents fillings from squeezing out during cooking. The slight depression also helps contain the sauce, preventing messy spillage when you take that first delicious bite.
- Flavor Construction:
- Spread approximately 2 tablespoons of pizza sauce on each interior bread surface, creating an even layer that reaches nearly to the edges. The sauce serves as both flavor foundation and moisture barrier that helps prevent the bread from becoming soggy from cheese oils. Layer half of the fresh mozzarella, torn or sliced into approximately 1/4 inch pieces, onto the sauce layer of two bread slices. The irregular pieces melt more evenly than perfect slices, creating pockets of gooey cheese throughout. Arrange pepperoni in a single, slightly overlapping layer on top of the cheese, followed by your cooked protein distributed evenly across the surface. Add the remaining mozzarella over the meat layer, which helps bind everything together during melting. Top with the remaining bread slices, sauce side facing the fillings, creating a self contained package of flavor.
- Cooking Perfection:
- Lightly spray or brush the exterior surfaces of your assembled sandwiches with olive oil, which promotes even browning and adds subtle flavor. Avoid excessive oil which can make the sandwich greasy rather than crispy. Place the prepared sandwich into your preheated panini press, closing the lid gently but firmly to compress slightly without flattening completely. Cook for approximately 3 to 4 minutes until the exterior develops a beautiful golden brown color with distinctive grill marks, and the cheese melts completely. If using the stovetop method, cook for approximately 2 minutes per side, maintaining pressure with the weighted skillet, then flip carefully using a spatula to cook the second side. The perfect panini has a crispy, golden exterior with fully melted cheese that stretches when pulled apart, and fillings heated thoroughly to create flavor harmony.
I particularly love the versatility of these panini. Growing up, pizza night was a family tradition, but as an adult with limited time, these sandwiches recreate those flavor memories without the lengthy preparation. My partner, initially skeptical about "pizza sandwiches," now requests them specifically on busy weeknights. When my young niece visited and helped assemble her own version with just cheese and sauce, her proud smile as she created "grown up food" made the simple meal feel like a special occasion. The familiar aroma that fills the kitchen creates an immediate comfort atmosphere that somehow makes even the most ordinary day feel a little more special.
Perfect Pairings
This versatile sandwich welcomes numerous accompaniments depending on the occasion and appetite. For a complete meal, serve alongside a simple arugula salad dressed with lemon vinaigrette, allowing the peppery greens and bright acidity to cut through the richness of the panini. During cooler months, a cup of tomato soup creates the ultimate comfort food pairing, perfect for dipping corners of the crispy sandwich into the warm soup. For casual gatherings, arrange panini quarters on a platter surrounded by marinated olives, pepperoncini, and pickled vegetables that echo Italian antipasto traditions. Those seeking lighter fare might enjoy cucumber spears tossed with rice vinegar and dill as a refreshing counterpoint to the warm, rich sandwich. For movie nights or game days, serve with a side of marinara sauce for additional dipping, creating a playful reference to pizza crust and sauce.
Creative Variations
This foundation recipe welcomes countless adaptations based on preferences or available ingredients. Create a vegetarian version by replacing pepperoni with sautéed mushrooms, bell peppers, and spinach for a primavera inspired option. Those preferring spicier profiles might add pickled jalapeños, crushed red pepper flakes, or spicy salami in place of traditional pepperoni. For a breakfast variation, incorporate scrambled eggs and breakfast sausage with the cheese and sauce for a morning pizza experience. White pizza fans can substitute ricotta mixed with garlic and herbs for the tomato sauce, topped with mozzarella and chicken. Create a Hawaiian version with diced ham and small pieces of pineapple that caramelize slightly during cooking. Those watching carbohydrates might use cloud bread or cauliflower thins as alternatives to traditional bread, though cooking time should be reduced slightly to prevent burning.
 Pin it
Preparation Pointers
These panini maintain good quality with proper preparation and storage techniques. For make ahead convenience, assemble sandwiches without the exterior oil up to 8 hours before cooking, wrapping tightly in plastic wrap and refrigerating. Allow them to come to room temperature for 15 minutes before cooking to ensure even heating. Leftover cooked panini can be stored in an airtight container in the refrigerator for up to 2 days. Reheat in a 325°F oven for 5 to 7 minutes to restore crispness, as microwave reheating tends to create sogginess. For feeding a crowd, prepare numerous sandwiches in advance, then cook in batches, keeping finished panini warm in a 200°F oven while completing the remaining sandwiches. This method allows everyone to eat together rather than serving in shifts. The assembled but uncooked sandwiches also freeze surprisingly well for up to 1 month when wrapped tightly in plastic wrap then aluminum foil. Thaw completely in the refrigerator before cooking as directed.
After perfecting this recipe through countless iterations, I've come to appreciate it as more than just a quick meal solution but rather as a celebration of how simple ingredients, properly prepared, can deliver extraordinary satisfaction. What began as a practical alternative to delivery pizza has become a legitimate preference in my household, with requests specifically for "those amazing pizza sandwiches" rather than traditional pizza. The concentrated flavors, textural contrasts, and handheld convenience transform familiar ingredients into something that somehow exceeds the sum of its parts. While restaurant panini often disappoint with sparse fillings or greasy exteriors, this homemade version consistently delivers the perfect balance of crispy, gooey, savory goodness that satisfies even the most discerning pizza enthusiasts.
Frequently Asked Questions
- → Can I use different types of bread for this Pizza Panini?
- Absolutely! While the recipe suggests hearty breads like sourdough, whole wheat, or ciabatta, you can use almost any bread that can withstand pressing. Italian bread, French bread, or even thick-sliced white bread work well. Avoid very soft or thin breads that might become soggy or fall apart during cooking. For best results, choose a bread with some structure that will create a crispy exterior when grilled.
- → What can I use if I don't have a panini press?
- No panini press? No problem! You can use a regular skillet or griddle with another heavy object to press the sandwich down. Try a cast iron skillet as your cooking surface, then place another heavy pan on top of the sandwich with a can or two for added weight. Alternatively, use a George Foreman grill, waffle iron (on low), or even a preheated oven (at 375°F) with the sandwich wrapped in foil and pressed between two baking sheets.
- → How can I make this Pizza Panini vegetarian?
- To make a vegetarian version, simply omit the meat and load up on vegetables! Try roasted red peppers, sautéed mushrooms, spinach, olives, artichoke hearts, or thinly sliced zucchini. For added protein, include some fresh basil leaves and a sprinkle of pine nuts, or add thin slices of grilled eggplant. You could also substitute the meat with plant-based protein alternatives like vegetarian pepperoni or crumbled plant-based sausage.
- → Can I prepare these paninis ahead of time for a crowd?
- Yes, these paninis are great for entertaining! Assemble them ahead of time (without adding the olive oil) and stack them with parchment paper between each sandwich. When guests arrive, simply brush with olive oil and grill them in batches. To keep the earlier batches warm, place them on a baking sheet in a 200°F oven. For a panini bar, prepare various fillings and let guests build their own before grilling.
- → What sides pair well with this Pizza Panini?
- This Pizza Panini pairs beautifully with several sides. For a classic combination, serve with a simple green salad dressed with vinaigrette. A cup of tomato soup makes for a cozy, complementary option. For a more substantial meal, add a side of sweet potato fries, regular fries, or potato chips. Marinated vegetable salads like coleslaw or Italian-style marinated vegetables also work well as lighter accompaniments.
- → How do I prevent the bread from getting soggy?
- To prevent soggy bread, don't oversaturate with sauce - a thin, even layer is sufficient. If your pizza sauce is particularly watery, strain it first or use a thicker marinara. Another trick is to create a barrier between the bread and wet ingredients by placing the cheese directly on the bread first, then adding sauce and other toppings. Finally, make sure your grill or pan is properly preheated before adding the sandwich to quickly crisp the exterior.