
 Pin it
Zesty Lime Cheesecake
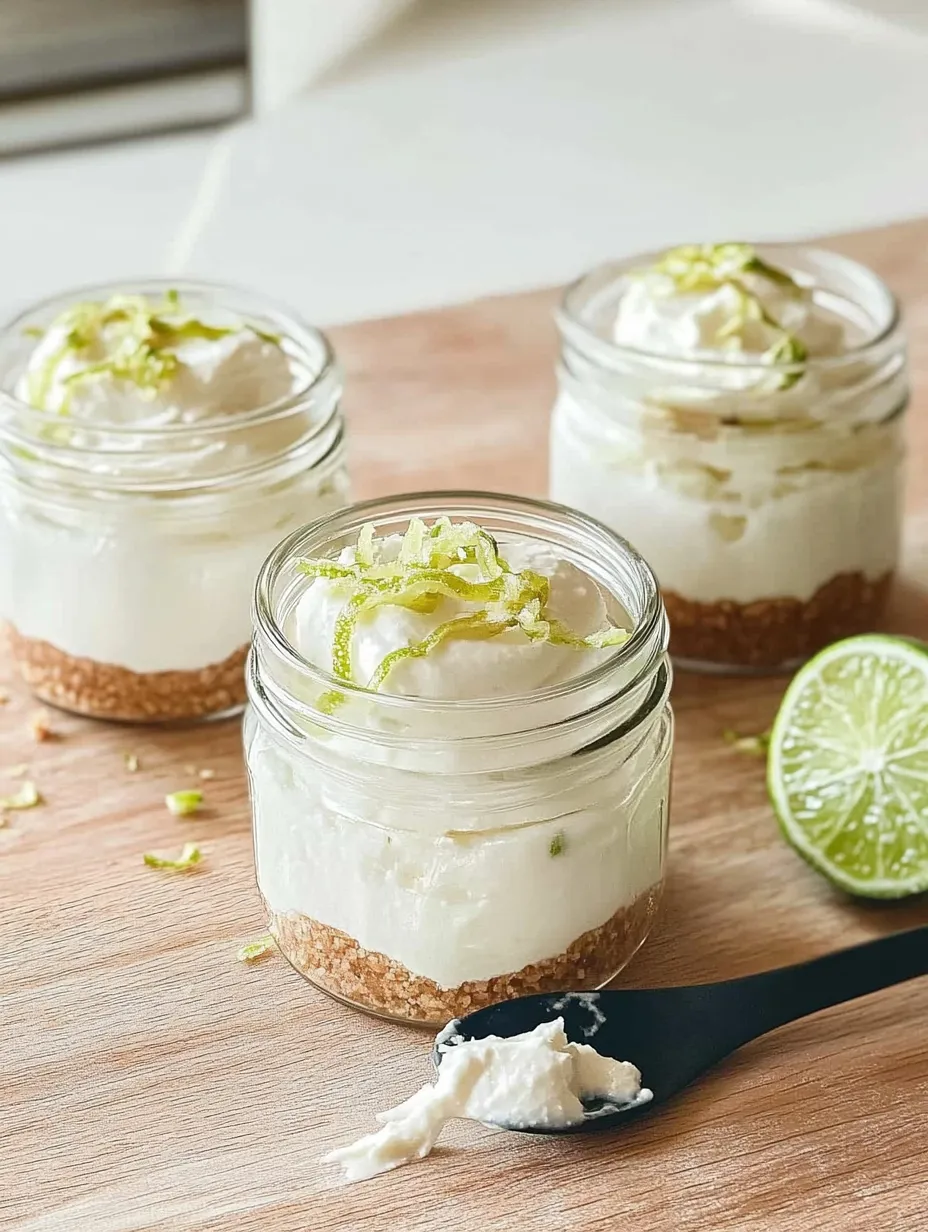
These individual key lime cheesecake jars deliver bright citrus flavor with none of the fuss of traditional baking. The secret lies in cottage cheese, which creates a silky smooth texture while keeping the prep incredibly simple. I created this recipe during a particularly hot summer when turning on the oven felt impossible but my craving for something creamy and tangy wouldn't subside.
Irresistible Qualities
My journey with these jars began as an experiment to use up extra cottage cheese. What started as kitchen improvisation quickly became my most requested dessert for gatherings. Even my husband, who claims not to like key lime pie, requests these weekly and has been known to sneak one from the refrigerator late at night.
Superior Ingredients
- Granola Base (1 cup, blended): Creates a perfectly textured foundation with natural sweetness that complements the tangy filling while providing essential crunch contrast
- Cottage Cheese (1.5 cups): The unexpected hero ingredient that blends into incredible creaminess while adding protein and depth without the heaviness of cream cheese
- Greek Yogurt (1/2 cup): Contributes tanginess and velvety texture that enhances the authentic key lime pie experience
- Vanilla Bean Paste (1 teaspoon): Adds sophisticated flecks of real vanilla and depth of flavor that extract alone cannot provide
- Maple Syrup (1/4 cup): Provides natural sweetness with complex notes that balance the acidity of the lime perfectly
- Key Lime Juice (2 tablespoons): Delivers that signature bright, tangy flavor that makes this dessert instantly recognizable
- Fresh Lime Zest (from 2 limes): Contains essential oils that intensify the lime flavor beyond what juice alone can provide
- Heavy Whipping Cream (1/2 cup): Whips into cloud like billows that crown each jar with decadent lightness
 Pin it
Effortless Assembly
- Crunchy Foundation:
- Begin with the granola base by placing your favorite granola into a food processor or blender. Pulse several times until it reaches a consistency similar to coarse sand with some slightly larger pieces remaining for texture. You want to maintain some crunch rather than pulverizing it completely. Divide this mixture evenly among three 8 ounce glass jars, gently pressing down with the back of a spoon to create a level surface. This forms the foundation that will support your creamy filling while providing textural contrast in each bite.
- Silky Filling Creation:
- Rinse your food processor bowl and blade before beginning the filling to ensure no granola remnants remain. Add the cottage cheese, Greek yogurt, vanilla bean paste, maple syrup, fresh key lime juice, and zest from two limes to the processor. Pulse briefly to combine ingredients, then process for exactly 12 to 15 seconds until the mixture becomes completely smooth with no visible cottage cheese curds. Avoid processing longer than necessary as over blending can incorporate too much air and affect the final texture. The mixture should be silky smooth but still have body, similar to a soft pudding consistency.
- Artful Layering:
- Using a spatula, carefully divide the creamy filling among your prepared jars, gently spooning it over the granola base. Take care not to disturb the base layer by pouring too quickly. Smooth the top of each jar with the back of a spoon for a level surface. Cover each jar with its lid or plastic wrap and refrigerate for at least two hours, though overnight is ideal. This resting period allows the flavors to meld beautifully while the filling sets to the perfect consistency. The granola base will soften slightly but still maintain enough texture to provide that satisfying contrast to the creamy filling.
- Finishing Flourishes:
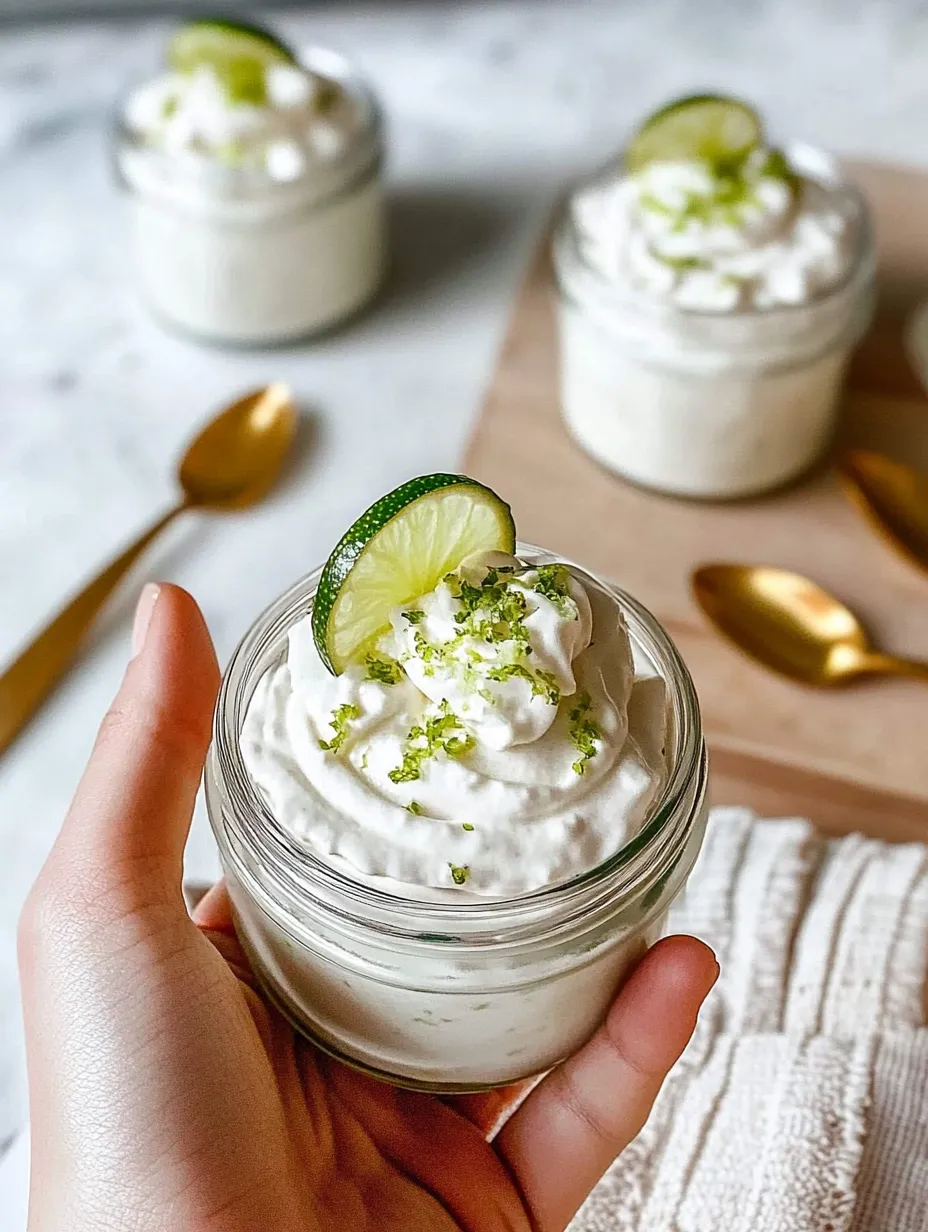
- Just before serving, prepare the whipped cream topping by placing the cold heavy whipping cream in a mixing bowl. Using a hand mixer or stand mixer with whisk attachment, begin whipping on medium speed until the cream starts to thicken. Add the vanilla bean paste and continue whipping until soft peaks form, approximately 3 to 4 minutes total. The cream should hold its shape but still have a slightly soft, billowy appearance. Transfer the whipped cream to a piping bag fitted with a star tip if you want an elegant presentation, or simply spoon generous dollops onto each jar. Garnish with additional lime zest and a small lime wedge or twist for visual appeal and an extra burst of citrus aroma.
I particularly love the versatility of this recipe. My personal favorite variation includes layering crushed pistachios between the crust and filling for added texture and subtle nutty flavor. When serving these for spring gatherings, I often prepare them in clear plastic cups for easy transport and serving. My grandmother always said desserts eaten from jars taste better because they contain all the joy of childhood in every spoonful. There might be some truth to that, as my children certainly light up when they see these in the refrigerator.
Delightful Pairings
These versatile jars welcome numerous serving suggestions to elevate the experience even further. For brunch gatherings, place them alongside fresh berries and mint sprigs on a serving tray for an elegant presentation. Coffee enthusiasts will appreciate pairing with a shot of espresso, allowing the bitter notes to complement the sweet tanginess. Summer entertaining calls for serving alongside coconut macaroons or butter cookies for textural contrast and complementary flavors. For dinner parties, present on individual dessert plates with a drizzle of raspberry coulis creating beautiful color contrast against the pale green filling. Consider serving slightly chilled rather than cold from the refrigerator to allow the full spectrum of flavors to bloom on the palate.
Creative Twists
This adaptable recipe welcomes numerous variations to suit different tastes or available ingredients. Experiment with the crust by substituting crushed gingersnap cookies or buttery shortbread for completely different flavor profiles. Create a tropical version by replacing key lime juice with a combination of pineapple juice and coconut cream. For chocolate lovers, add a layer of chocolate ganache between the crust and filling, allowing it to set before adding the key lime mixture. Those seeking less tanginess might prefer adding an extra tablespoon of maple syrup and reducing the lime juice slightly. Consider enhancing the filling with finely chopped fresh mint leaves folded in just before jarring for a refreshing herbal note that complements the citrus beautifully.
Preservation Pointers
These cheesecake jars maintain excellent quality when properly stored in the refrigerator. For optimal freshness, cover each jar tightly with its original lid or plastic wrap pressed directly onto the surface to prevent air exposure. The desserts will continue developing flavor for up to five days, though texture is best within the first three days. If preparing in advance for entertaining, consider assembling the base and filling but waiting to add the whipped cream until just before serving. For transporting to gatherings, place jars in a cooler with ice packs to maintain temperature and texture. While freezing is not recommended for the complete dessert, you can freeze the prepared granola base in jars for up to one month to streamline future preparation.
 Pin it
After creating countless variations of this recipe, I've come to appreciate the beautiful simplicity of transforming humble ingredients into something truly special. What began as a practical solution to avoid heating the kitchen has become a signature dessert that friends and family specifically request. The joy of preparing individual portions means everyone gets their perfect ratio of crust to filling, and the make ahead nature leaves me free to enjoy gatherings rather than fussing over last minute dessert preparation. While traditional key lime pie certainly has its place, these unassuming jars deliver all the flavor with considerably less effort and much more versatility.
Frequently Asked Questions
- → Can I substitute the cottage cheese with something else?
- While cottage cheese is key to this recipe's unique texture and nutritional profile, you could substitute with ricotta cheese for a similar result. However, the texture will be slightly different, and you may need to adjust the sweetness. Traditional cream cheese would work too, but would create a much heavier, more caloric dessert.
- → How long do these cheesecake jars last in the refrigerator?
- These No Bake Key Lime Pie Cottage Cheesecake Jars will keep well in the refrigerator for up to 3 days. The granola base may soften slightly over time, but the flavor will remain delicious. For the best presentation, add the whipped cream topping just before serving.
- → Can I use regular lime juice instead of key lime juice?
- Yes, you can substitute regular lime juice for key lime juice. Key limes tend to be more aromatic and slightly more tart, but regular limes will still create a delicious dessert. You might want to add a bit more zest to compensate for the slightly different flavor profile.
- → What can I use instead of granola for the crust?
- If you don't have granola, you can substitute with graham cracker crumbs, crushed digestive biscuits, or even crushed vanilla wafers. For a gluten-free option, try using crushed gluten-free cookies or a mixture of nuts and dates processed until crumbly.
- → Can I make these dessert jars ahead of time?
- Absolutely! These cheesecake jars are perfect for making ahead. Prepare the crust and filling up to 24 hours in advance, but add the whipped cream topping just before serving for the best texture and presentation. This makes them ideal for entertaining.
- → How can I make this recipe dairy-free?
- To make a dairy-free version, substitute the cottage cheese with dairy-free yogurt (strained to remove excess liquid) or silken tofu. Replace the Greek yogurt with coconut yogurt and use coconut cream instead of heavy whipping cream. You may need to adjust the sweetness slightly depending on the products you use.