
 Pin it
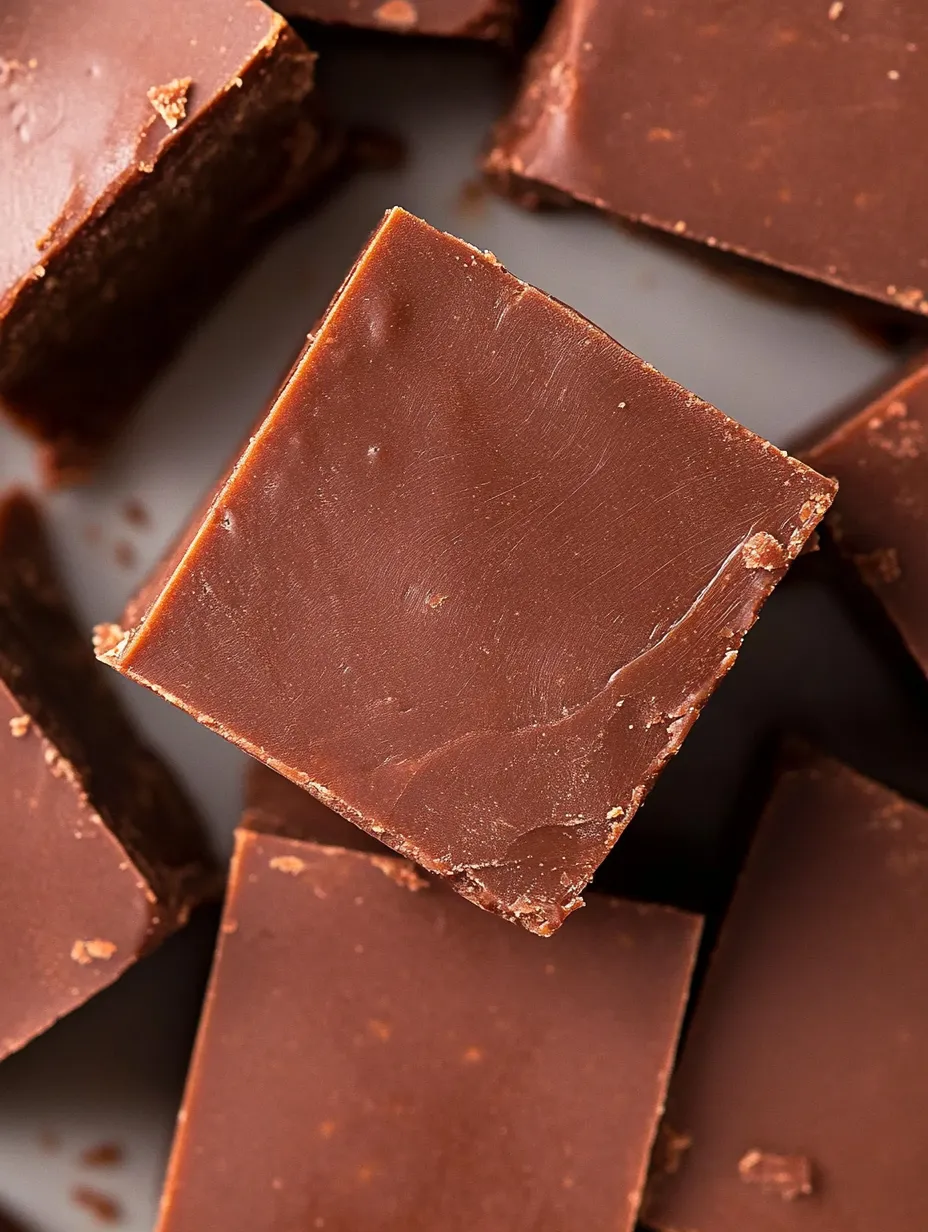
This velvety chocolate fudge delivers pure indulgence with remarkably little effort. The secret lies in its simplified preparation method that bypasses traditional candy making complexities while still achieving that perfect smooth, melt in your mouth texture. I discovered this recipe years ago when looking for a foolproof holiday treat to make with my children. Unlike temperamental traditional fudge recipes demanding precise temperatures and timing, this version produces consistent results even for beginners.
I first made this fudge when hosting a holiday gathering where I needed an impressive dessert without spending hours in the kitchen. The look of pure joy on my guests' faces as they savored each bite convinced me to keep this recipe in my permanent collection. Now it's my signature contribution to potlucks and holiday cookie exchanges, with everyone requesting the recipe after their first taste.
Quality Components
- Milk Chocolate Chips (3 cups): Forms the foundation of flavor and creates that signature smooth texture that melts beautifully on your tongue
- Sweetened Condensed Milk (1 can/1¼ cups): Provides essential sweetness while contributing to the luscious creaminess without any risk of graininess
- Vanilla Extract (1½ teaspoons): Enhances and deepens the chocolate flavor with aromatic complexity that elevates the entire dessert
- Salt (pinch): Acts as a critical flavor enhancer that makes the chocolate taste more intensely chocolatey while balancing sweetness
- Powdered Sugar (1 cup): Creates the perfect fudge structure and stability while maintaining that coveted smooth mouthfeel
Foolproof Method
- Chocolate Melting Magic:
- Begin with a heavy bottomed medium saucepan placed over the lowest possible heat setting on your stovetop. Add the milk chocolate chips, sweetened condensed milk, vanilla extract, and pinch of salt to the cool pan before turning on the heat. This prevents the chocolate from overheating initially. Stir continuously using a silicone spatula that can reach all corners of the pan, paying special attention to the bottom where scorching might occur. Watch as the chocolate begins transforming from solid chips to a glossy, flowing mixture that resembles liquid silk. Continue stirring gently until completely smooth with no remaining lumps, which typically takes about 5 minutes depending on your stove. Remove from heat immediately once melted to prevent any risk of the chocolate seizing or becoming grainy.
- Texture Perfection:
- With your pan off the heat but mixture still warm, sift the powdered sugar directly over the melted chocolate mixture to prevent any lumps. Fold gently but thoroughly using your spatula, incorporating the powdered sugar completely into the chocolate mixture. You'll notice the texture becoming slightly thicker and more substantial, developing that signature fudge consistency. Work relatively quickly during this stage to ensure the mixture remains pliable enough to spread easily. The finished mixture should be thick enough to hold soft peaks when the spatula is lifted but still spreadable without requiring excessive force.
- Setting Stage:
- Prepare your 9 inch square pan by lining completely with parchment paper, allowing excess paper to hang over the edges which will serve as handles for removing the finished fudge. Pour your prepared fudge mixture into the lined pan, using your spatula to guide it into an even layer that reaches all corners. Gently tap the filled pan on your counter several times to release any trapped air bubbles and create a perfectly smooth surface. Run your spatula lightly across the top for a professional looking finish with minimal marks or ridges. Transfer immediately to your refrigerator uncovered for the initial cooling period of about 30 minutes, then cover loosely with plastic wrap for the remaining chilling time.
- Final Transformation:
- After the full chilling period of at least two hours, remove your set fudge from the refrigerator. Grasp the parchment paper overhangs and lift the entire block of fudge out of the pan, placing it on a cutting board. Allow the fudge to sit at room temperature for approximately 10 minutes to take off the initial chill, which prevents cracking during cutting. Using a large sharp knife, cut into squares of your desired size, wiping the blade clean between cuts for the cleanest edges. For perfect presentation, allow cut pieces to come fully to room temperature before serving, which maximizes the creamy mouthfeel and chocolate flavor intensity.
 Pin it
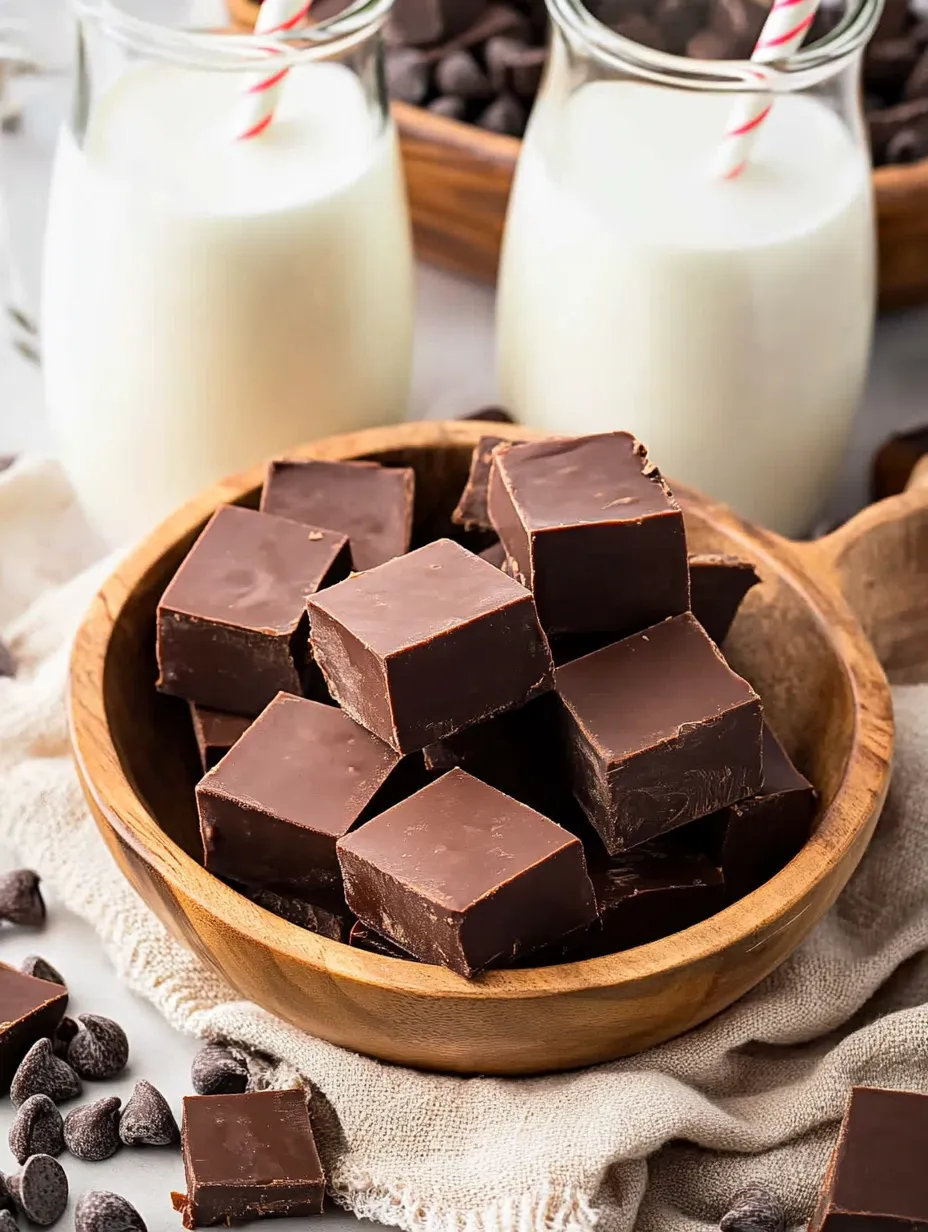
I particularly appreciate how this fudge maintains its quality for days after preparation, unlike many desserts that peak immediately after making. The condensed milk creates a protective moisture barrier that prevents drying out even when stored properly. My family has a tradition of making multiple batches during December, with each family member selecting their preferred mix in or topping. My personal favorite variation is adding a layer of crushed peppermint candies on top that provides festive color and delightful textural contrast to the smooth chocolate.
Enjoyment Ideas
Transform this simple fudge into an impressive dessert experience by considering thoughtful pairings and presentations. Create a dessert charcuterie board featuring fudge squares alongside fresh berries, candied nuts, and shortbread cookies for textural contrast. For coffee lovers, serve small fudge squares alongside espresso shots for an elegant after dinner offering. During holiday seasons, arrange fudge pieces on vintage plates with sprigs of mint or edible gold dust for visual impact. Consider wrapping individual pieces in waxed paper and placing in decorative tins for heartfelt homemade gifts that travel well. For summer gatherings, sandwich thin slices between graham crackers with marshmallow cream for an elevated s'mores experience that requires no campfire.
Creative Spins
This versatile base recipe welcomes countless variations to suit any preference or occasion. Create marbled masterpieces by dividing the base mixture and adding different flavored extracts or food colorings before swirling together in the pan. For added dimension, incorporate textural elements like toasted coconut, crushed cookies, or toffee bits during the final mixing stage. Experiment with flavor infusions by steeping spices like cinnamon or cardamom in the condensed milk before adding to the chocolate. Layer complementary flavors by preparing half batches of different varieties and creating striped effects in your pan. For special dietary needs, explore alternative sweetened condensed milk options made from coconut or oat milk that maintain the essential creamy texture while accommodating restrictions.
Perfect Preservation
Store your finished fudge properly to maintain its exceptional quality for maximum enjoyment. For counter storage, place fudge pieces in a single layer in an airtight container with parchment between layers if stacking becomes necessary. Keep away from direct sunlight or heat sources that might cause melting or texture changes. When refrigerating for longer storage periods, wrap individual pieces tightly in waxed paper before placing in airtight containers to prevent moisture loss or absorption. Allow refrigerated fudge to warm completely to room temperature before serving to experience the ideal mouthfeel and flavor release. For freezer storage beyond two weeks, wrap individual portions in plastic wrap, then foil, before placing in freezer bags with air removed to prevent freezer burn or taste transfer.
 Pin it
After making this fudge countless times over the years, I've come to appreciate it as more than just a simple sweet treat. It represents the perfect balance between impressive results and accessible technique that makes home baking so satisfying. While traditional fudge recipes might intimidate beginners with their talk of soft ball stages and marble slabs, this version delivers equally delicious results without the stress. The smiles it brings to friends and family make the minimal effort completely worthwhile. Whether prepared as a personal indulgence or shared celebration, this fudge creates sweet memories alongside its irresistible flavor.
Frequently Asked Questions
- → Do I need a candy thermometer for this No-Fail Chocolate Fudge?
- No, that's what makes this recipe truly 'no-fail'! Unlike traditional fudge recipes that require precise temperature monitoring, this simplified version doesn't need a candy thermometer at all. Just melt the ingredients together, stir in powdered sugar, and refrigerate until set.
- → Can I use different types of chocolate chips in this fudge recipe?
- Absolutely! While milk chocolate chips create a classic fudge flavor, you can substitute semi-sweet or dark chocolate chips for a less sweet, more intense chocolate flavor. White chocolate chips work too for a completely different variation. Just keep the measurements the same.
- → How long does homemade fudge last?
- When stored properly in an airtight container, this fudge will last up to 2 weeks at room temperature, or up to 3-4 weeks in the refrigerator. For even longer storage, you can freeze it for up to 3 months - just be sure to wrap it tightly in plastic wrap and place in a freezer-safe container.
- → Why is my fudge too soft or not setting properly?
- If your fudge isn't setting firmly, it likely needs more time in the refrigerator. Allow at least 2 hours, but some batches may need up to 4 hours to fully set. Also, make sure you're using the correct amount of powdered sugar, as this helps with the setting process.
- → How can I add variations to this basic fudge recipe?
- This recipe is wonderfully adaptable! Try folding in 1/2 cup of chopped nuts, crushed peppermint candies, mini marshmallows, or cookie pieces after adding the powdered sugar. You can also swirl in peanut butter or caramel before refrigerating, or sprinkle the top with sea salt for a sweet-salty combination.
- → Why do I need to line the pan with parchment paper?
- Lining the pan with parchment paper makes removing and cutting the fudge much easier. The parchment creates a non-stick surface and allows you to lift the entire block of fudge out of the pan before cutting. This results in cleaner cuts and prettier presentation.